Brands and Your Colour Catalogue
Tutorial 20.3: Brands and Your Colour Catalogue
Introduction
Brands used to be free-text on each product. They're now a proper catalogue with a consistent pick-list across Products, Colour products, and the Colour Bar. Each brand is tagged as a product brand, a colour brand, or both, so the right options appear in the right places.
Who this is for: Owner, Admin, Manager, Receptionist What you'll learn:
- Create and edit brands
- Understand the three brand types (Product / Colour / Both)
- Reassign products when you delete a brand
- Create brands inline from the product and colour-product forms
Time to complete: 5 minutes
Prerequisites
- Logged in with the
manage-productspermission (Owner, Admin, Manager, or Receptionist) - Useful but not required: at least one retail or colour product already in your catalogue
Step-by-Step Instructions
Step 1: Open the Brands page
- Click Products in the sidebar (it reads Products & Colour once colour management is switched on)
- Click Manage Brands at the top-right of the Products page
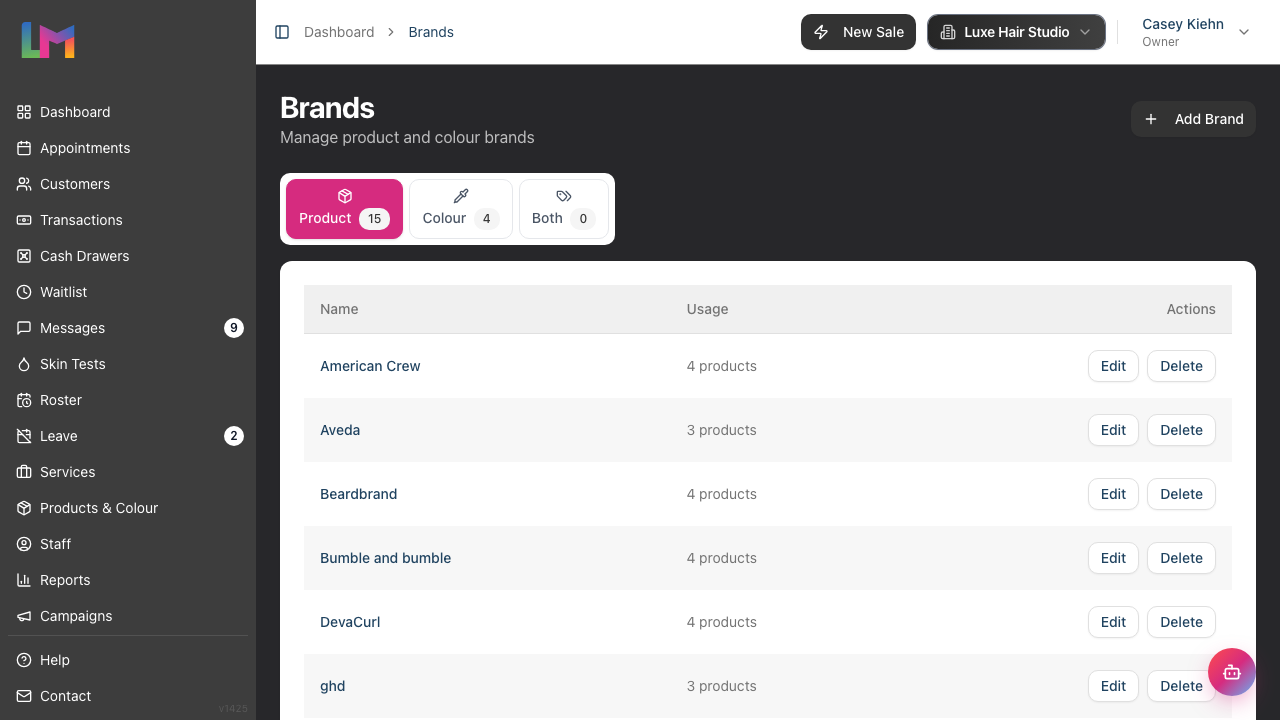
The Brands page lists every brand in your salon, grouped into three tabs — Product, Colour, and Both — with a count next to each tab. Each row shows the brand name and how many products use it (e.g. "3 products" or "Not used").
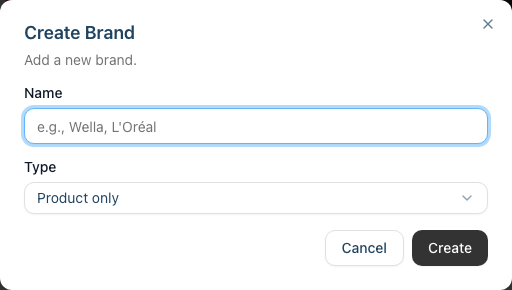
Step 2: Create a brand
- Click Add Brand at the top-right
- Enter a Name (required — e.g. "Wella", "Olaplex")
- Pick a Type:
- Product only — appears in the Brand picker on retail/professional products
- Colour only — appears in the Brand picker on colour products (and, once a colour product carries the brand, shows as that product's brand label on the Colour Bar)
- Both products and colour — appears in both Brand pickers
- Click Create
New brands default to the type of the tab you're currently on, so opening Add Brand from the Colour tab pre-selects Colour only.
Step 3: Edit a brand
- Click Edit on the brand's row
- Change the name or type
- Click Update
Changing a brand's type moves it between the Product / Colour / Both tabs and updates where it appears in pickers. Existing products stay on the brand — changing the type doesn't move them between catalogues.
Step 4: Create a brand inline (from a product form)
You don't have to visit the Brands page first. Any form with a Brand picker accepts new brands on the fly:
- Click the Brand dropdown on a product or colour-product form
- Start typing a new brand name
- Click Create: {name} at the bottom of the list
- The brand is created immediately and selected on the form

The type is inferred from where you created it:
- Products form → type is Product only
- Colour products (Add Colour Product dialog) → type is Colour only
If the brand actually exists on both sides of your business, edit it afterwards and switch the type to Both products and colour.
One name per brand. Brand names are unique within a salon. If a brand of that name already exists — even with a different type — inline create won't make a second copy and the new brand simply won't appear. When that happens, open the Brands page and edit the existing brand to Both products and colour so it shows in both pickers, rather than trying to create it again.
Step 5: Delete a brand
- Click Delete on the brand's row
- If the brand has products attached, the dialog shows how many and offers an optional Reassign to dropdown
- Pick another brand to move the products to, or leave it on Don't reassign to leave them brand-less
- Click Delete to confirm

Reassignment is optional — if you pick "Don't reassign", the products remain but their Brand field is cleared.
Brand types at a glance
| Type | Appears on the product Brand picker? | Appears on the colour-product Brand picker? |
|---|---|---|
| Product only | Yes | No |
| Colour only | No | Yes |
| Both products and colour | Yes | Yes |
Pick Both whenever a brand genuinely sells into both sides of your business — it's cleaner than creating two near-identical brand records.
Common Pitfalls
"My new brand isn't showing on the Colour tab"
Its type is probably Product only. Open the Brands page, Edit the brand, and switch the type to Colour only or Both products and colour.
"I created a duplicate brand by accident"
Open the duplicate, click Delete, and in the reassign dropdown pick the canonical brand. The duplicate is removed and its products move across.
"Inline create produced the wrong type"
Inline-created brands default to whichever catalogue the form belongs to — Products form gives you Product only, Add Colour Product gives you Colour only. Edit the brand afterwards to change the type; this is a convenience, not a lock-in.
Tips and Best Practices
- Add brands before importing a large product list — saves reassigning later.
- Prefer Both over duplicates — if a brand sells both retail and colour, mark it Both products and colour rather than creating "Wella" twice.
- Avoid near-duplicates — "Wella" and "Wella Professionals" as separate brands will split your reporting forever.
- Reassign before deleting heavy brands — if the duplicate has many products attached, pick a reassignment target rather than leaving them brand-less.
Related Tutorials
- Tutorial 7.2: Product Catalog and Inventory Management — assigning brands to regular products
- Tutorial 20.4: Setting Up Colour Products — assigning brands to gram-tracked colour products
- Tutorial 20.5: Colour Stock Take — filter stock take by brand
Frequently Asked Questions
Can I merge two brands?
Not directly. Delete one brand and, when prompted, reassign its products to the other. The target brand absorbs the products and the duplicate is removed.
Do brands affect reporting?
Yes — the Colour tab, colour-product pickers, and stock-take filter all work from the brand list, and keeping brands tidy keeps future brand-level reporting clean.
Can staff create brands, or only Owners?
Anyone with the manage-products permission — Owner, Admin, Manager, and Receptionist — can create, edit, and delete brands, including inline creation from a product form (deleting a brand uses the same permission, not an Owner-only one). Only the Staff role is excluded: stylists and therapists can see brands on products but can't open the Brands page or create brands inline.
Does a brand need to exist before its products?
No, but it's easier that way. If you're importing lots of products, create the brands first so you can pick them from the dropdown instead of creating dozens of brands inline.
Can I deactivate a brand without deleting it?
Not yet. Today the only options are keep or delete (with optional reassignment). If you want to retire a brand but keep its history, reassign its products to the replacement and then delete the old brand.
Last Updated: April 2026