Colour Bar: Planning a Formula
Tutorial 20.11: Colour Bar: Planning a Formula
Introduction
This tutorial covers the Colour Bar's Edit screen — where you build the formula, weigh each product live against the scale, and apply the colour, all on one screen. You reach it from the appointment hub via three entry paths: Start fresh, Copy & edit, or Edit formula (when a formula is already in progress on this appointment).
The Edit screen isn't just a planning step. It's the working screen at the chair: add your bowls and products, pour each one onto the scale until you hit the weight you want, then tap Done — apply colour to lock it in and head back to Today. There's no separate "save then go and mix" — the weight you capture is what you mixed.
When do I use the Mix screen instead? If you tapped Use this formula (re-running a previous formula unchanged) or Resume mixing (picking up a formula you'd already started), you weigh on the Mix screen rather than here — see Tutorial 20.12. The Edit screen is for formulas you're building or changing.
Who this is for: Stylists / colourists at the Colour Bar station What you'll learn:
- Three ways to reach the Edit screen
- Add bowls, name them, add products and a developer
- Weigh each product live with the scale (or type the grams)
- Per-bowl barcode scanning
- Apply the colour and return to Today
Time to complete: 10-15 minutes
Prerequisites
- Colour Bar set up and a colour appointment visible on Today (Tutorial 20.10)
- Colour products in your catalogue (Tutorial 20.4)
- A scale paired, or the on-screen mock scale active, if you want to weigh live (Tutorial 20.12)
Three ways to reach the Edit screen
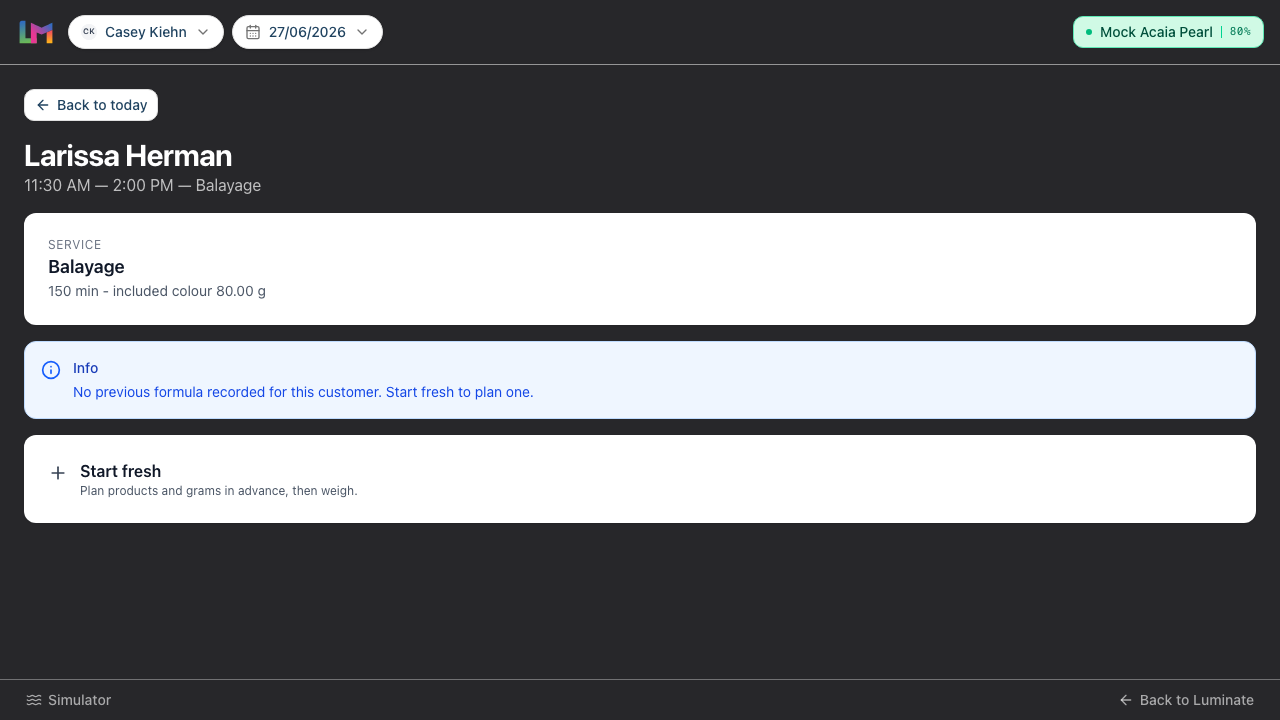
On the appointment hub (what you see after tapping a row on Today), the buttons on offer depend on what already exists for this appointment and customer:
| Path | When shown | What it does |
|---|---|---|
| Start fresh | Whenever there's no formula in progress on this appointment | Creates an empty formula and opens it on Edit |
| Copy & edit | When the customer has a finalised formula from a previous visit | Duplicates the most recent formula onto this appointment and opens it on Edit so you can tweak it |
| Use this formula | When the customer has a finalised formula from a previous visit | Duplicates and goes straight to the Mix screen (Tutorial 20.12) to weigh against the unchanged plan |
| Edit formula | When a formula is already in progress on this appointment (status "in mix") | Reopens that formula on Edit |
A couple of things to note:
- Start fresh is always offered when there's no formula in progress — even when the customer also has a Last formula card with Copy & edit / Use this formula. Build from scratch or start from their last visit, your call.
- When a formula is already in mix, the hub shows Edit formula alongside Resume mixing — Edit to change the recipe, Resume mixing to carry on weighing on the Mix screen.
Once a formula has been applied (status "colour on" or "leftovers due"), the hub shows Weigh leftovers instead of Edit — the recipe is locked by then, and the next job is recording what you didn't use (Tutorial 20.13).
Step-by-Step Instructions
Step 1: Land on Edit
Tap Start fresh, Copy & edit, or Edit formula from the appointment hub. The Edit screen opens with the formula's current content — empty for Start fresh, the duplicated recipe for Copy & edit, or your in-progress formula for Edit formula.
Step 2: Name the formula and your bowls
At the top of the screen:
- Formula name (optional) — a human label you'll recognise next time (e.g. "Balayage – Lorenzo Roberts").
Each bowl also takes an optional name. Tap the pencil next to the bowl number, type something like "Roots" or "Mids & ends", and press Enter. Named bowls make a multi-bowl mix much easier to follow at the chair. Leave it blank and the bowl just shows "Bowl 1", "Bowl 2", and so on.
Developer has moved. It's no longer a single dropdown at the top — the developer is now chosen per bowl as a real product with a mixing ratio (see "Add the developer" below). This bills the exact developer you used and keeps its stock accurate, just like your colours.
Step 3: Build the bowls
Each bowl is a card on the Edit screen. The first bowl is already there; add more up to six.
Per bowl you can:
- Add products — tap the big Add Products button to open the full-screen catalogue browser (or scan a barcode — see Step 4). Pick one or more shades and tap Add To Formula; each appears as a new row in this bowl.
- Change the bowl number on any row to move a product to a different bowl.
- Remove a product — tap the trash icon on its row.
- Remove the bowl — tap the trash icon in the bowl header. Available whenever there's more than one bowl. Any products in the bowl go with it.
Each bowl holds up to 10 products. Once full, the button reads "Bowl full (10 max)".
To add another bowl, tap Add bowl below the last bowl card. The button is disabled once you've hit six.
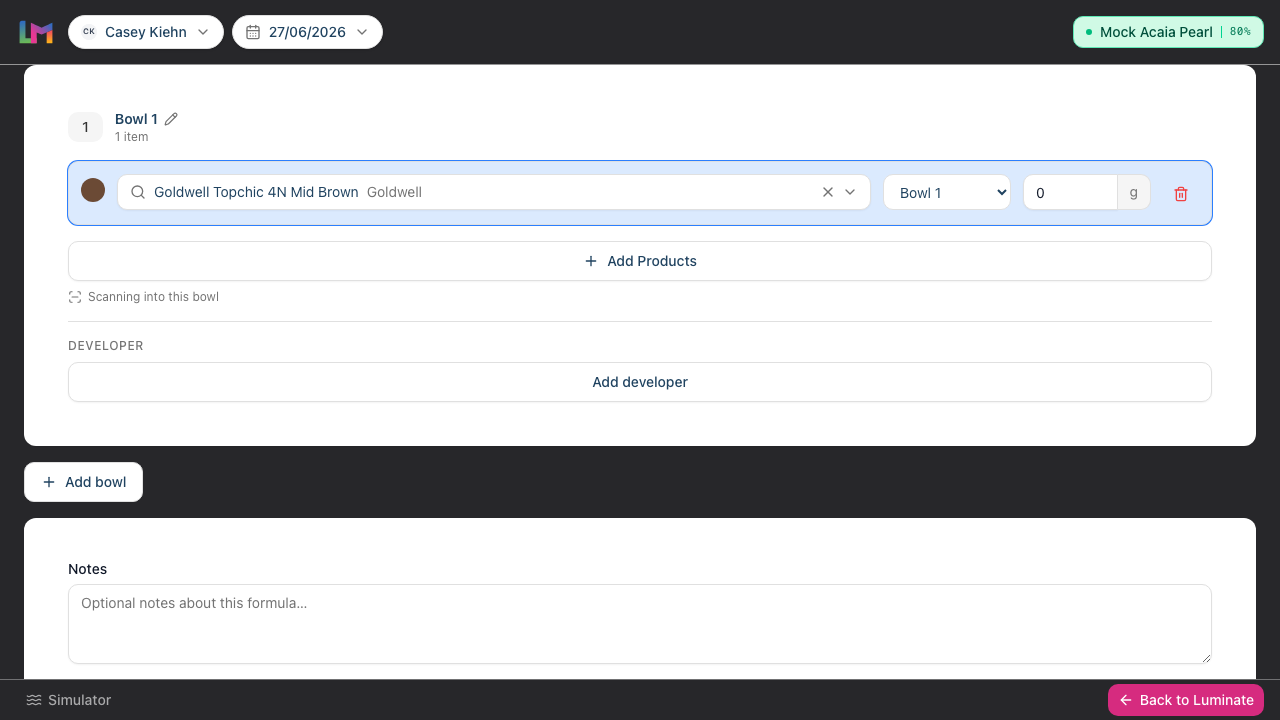
Add the developer
Below the products in each bowl is a Developer section:
- Tap Add developer to open the catalogue — it shows only your developers (the catalysts/peroxides), so you pick the exact brand and strength you're using (e.g. Welloxon Perfect 6% 20vol).
- Once chosen, pick the ratio with the big chips: 1× (same as the bowl's product total), 1.5×, 2×, or Custom for anything else (e.g. 1.75×). The developer's grams are worked out for you — ratio × the bowl's total product weight — and update live as you weigh or change products.
- One developer per bowl. Tap Change developer to swap it, or the trash icon to remove it.
Because the developer is a real product, its grams come off stock and feed the cost figures exactly like your colours — no more guessing. You don't weigh the developer yourself; its grams are always calculated from the ratio.
Browsing the catalogue
The Add Products browser fills the screen — built for a gloved hand on a tablet:
- Group view drills Brand → Product Line → Shade Family down the left, with the matching shades as big swatch tiles on the right. List view shows every shade in one flat, searchable grid.
- Search filters by shade name, brand, code, or family.
- Tap a tile to select it — the whole tile is the button, and a tick appears. The footer keeps a running "N selected" count.
- Shades already in this bowl show ticked and disabled ("Already in this bowl"); once the bowl is full, the rest lock.
- Tap Add To Formula to drop everything you picked into the bowl, or Cancel to back out without changes.
- Products without a line or family still show up under "Other products" / "Ungrouped" — organise your catalogue (Tutorial 20.4) to make browsing quicker.
Step 4: Scan products per bowl
The Colour Bar's barcode scanner is active on one bowl at a time — the active bowl shows "Scanning into this bowl" under its Add Products button. By default it's the most recently added bowl. To switch:
- Tap the bowl card to focus it — the scan hint moves to that card
- Scan a product's barcode with your USB / Bluetooth scanner
- The product is added to that bowl automatically (you'll see a brief "Added [product name]" confirmation)
- Weigh it, or type the target grams, on the new row
While you're on the Edit screen, the app-wide barcode scanner (which normally jumps to QuickPOS) is paused — so scans feed the formula editor instead.
If a scan doesn't match any product, you'll see "Barcode not recognised". Check the barcode is set on the colour product (Tutorial 20.4).
Step 5: Weigh each product live (or type the grams)
This is the heart of the Edit screen. There are two ways to set each product's grams:
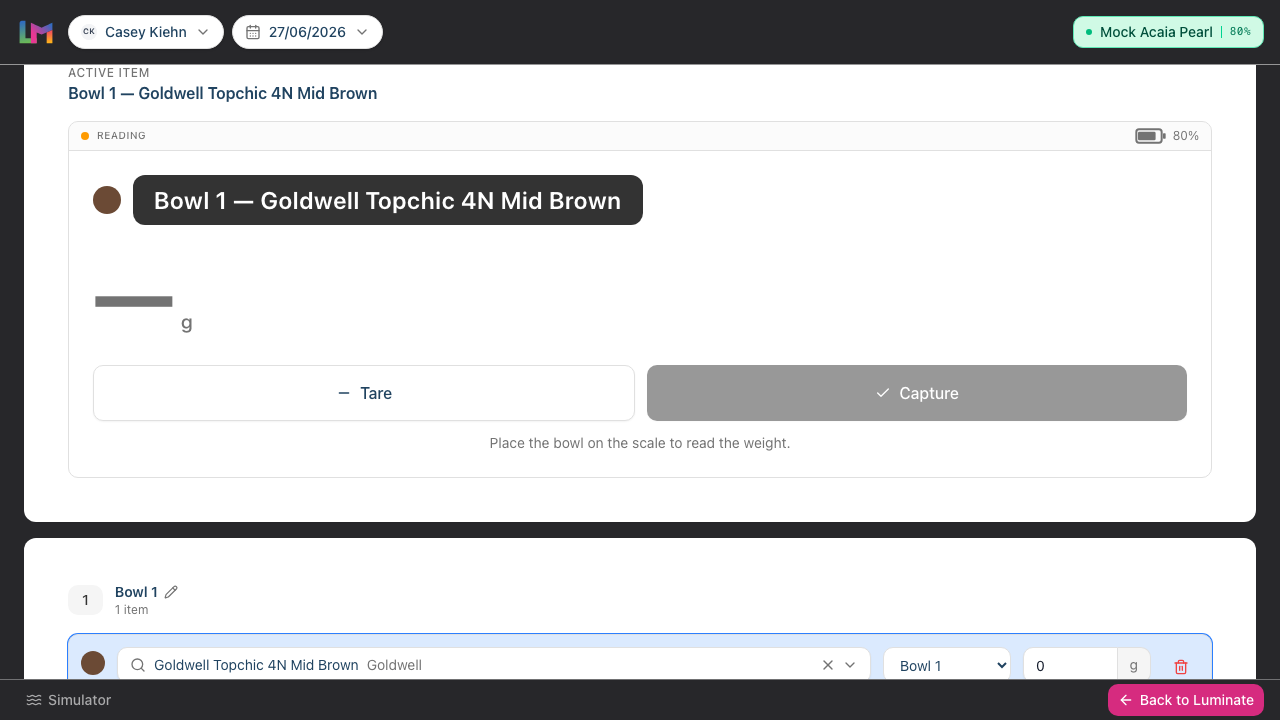
Weigh it on the scale (recommended)
Near the top of the screen, an Active item card shows the product currently on the scale — "Bowl 1 — Wella Koleston 6/0", say — with a big live weight readout and Tare and Capture buttons.
- Put the bowl on the scale and tap Tare to zero it
- Pour the active product slowly — the weight climbs in real time
- When it settles on the weight you want, tap Capture — that weight becomes the product's grams
- The card automatically advances to the next product that still needs weighing
The active product is highlighted in its bowl. To weigh a different one next, just tap its row — it becomes the active item. Once every product has a weight, the card shows "All targets set".
The developer is never weighed here — its grams are always calculated from the ratio you set, so the Active item card skips straight past it.
Type the grams instead
If you already know the weight, type it straight into the grams field on the product's row (in 0.1 g steps) instead of weighing. Mix and match — weigh some, type others.
Step 6: Add optional notes
Below the bowls is a Notes field — use it for processing time, technique, allergy reminders, or anything the next stylist should know. Optional.
Step 7: Check the totals
Below Notes, a live summary shows:
- Target total grams across all bowls
- Estimated cost based on each product's cost per gram
Use these to sanity-check the mix before you apply it.
Step 8: Apply the colour
When every product has a weight you're happy with:
- Tap Done — apply colour
- The formula is saved, the weights are recorded as what you mixed, and stock comes off your catalogue. Any overage charge is staged onto the appointment's bill (Tutorial 20.8).
- The Colour Bar returns to Today with the message "Formula saved. Apply colour now — weigh leftovers when you return."
That's it — go and apply the colour. When you come back, the appointment shows Weigh leftovers so you can record what went in the bin (Tutorial 20.13).
Done — apply colour stays disabled until every row has both a product and grams greater than zero.
Tap Cancel to return to the appointment hub without applying. Anything you added on the Edit screen but didn't apply is discarded.
There's no "save a draft" button on the Colour Bar. Tapping Done — apply colour finalises straight away — stock moves and billing stages there and then. If you want to plan a formula in advance without applying it (e.g. before the client's even in the chair), build and save it from the customer's record in the main app instead (Tutorial 20.6), then Use this formula or Copy & edit it here on the day.
Common Pitfalls
"Scan isn't adding a product to my bowl"
The Colour Bar scans into one focused bowl at a time. Tap the bowl card you want to scan into — its hint should read "Scanning into this bowl". If the scan still doesn't match, check the barcode is set on the colour product (Tutorial 20.4).
"I can't add a seventh bowl"
Six is the maximum — plenty for almost every real-world mix. If you genuinely need more, split across two formulas on the same appointment.
"Done — apply colour is greyed out"
Every row needs a product selected AND grams greater than zero, and there must be at least one row. Weigh or type the missing amounts and the button becomes active.
"I tapped Done before I'd finished mixing"
Done — apply colour finalises immediately — there's no confirmation step, and stock has already moved. If you applied too early, you can return to the appointment, tap into the formula, and Revert it from the Mix screen to reopen and adjust (Tutorial 20.12). Best avoided — only tap Done when the colour really is mixed.
"I added the wrong product"
Tap the trash icon on the row, then tap Add Products (or scan) to add the correct one.
"Copy & edit brought in products we don't stock any more"
Deactivated products won't appear in the Add Products catalogue, but they can come over from a Copy & edit. Tap the trash icon on any deactivated product row and choose a replacement before you weigh.
"I tapped Remove on a bowl by accident"
The bowl and any products in it are gone immediately. Tap Cancel to return to the hub and choose Edit formula to reload the last-saved state (anything unsaved is lost).
Tips and Best Practices
- Name the formula, always — a named formula is easier to find on the customer's next visit than "Unnamed — 14/4/26".
- Name your bowls on a multi-bowl mix — "Roots" / "Mids & ends" beats "Bowl 1" / "Bowl 2" when you're three bowls deep.
- Weigh as you pour — tap a product's row to make it active, tare, and Capture. The grams you capture are exactly what gets billed and taken off stock.
- Use fewer, fuller bowls — six bowls is rarely necessary. Three or four keep the mixing station tidy.
- Scan a known product — for a product you know by sight, a scanned barcode is the fastest add; reach for Add Products when you want to browse the catalogue.
- Copy & edit for regulars — if the customer's a regular, start from their last formula and tweak rather than building from scratch.
- Review the cost estimate — if it's way higher than last time, something's off in the mix before you even pour.
Related Tutorials
- Tutorial 20.4: Setting Up Colour Products — getting the barcode and stock right
- Tutorial 20.6: Creating a Colour Formula — planning and saving a formula in the main app, in advance
- Tutorial 20.10: Colour Bar: Day-to-Day Use — how you reached the appointment hub
- Tutorial 20.12: Colour Bar: Mixing with the Scale — weighing against a fixed plan (Use this formula / Resume mixing)
- Tutorial 20.13: Colour Bar: Reweighing Leftovers — what you do when you come back
Frequently Asked Questions
Can I plan a formula before the appointment without applying it?
Not from the Colour Bar Edit screen — its only save action is Done — apply colour, which finalises straight away. To prepare a formula in advance and save it as a plan, build it from the customer's record in the main app (Tutorial 20.6). On the day, open the appointment on the Colour Bar and Use this formula or Copy & edit it.
Does tapping Done decrement stock?
Yes. Done — apply colour records the weights, takes the grams off stock, and stages any overage charge — all in one step. (This is different from saving a plan in the main app, which doesn't touch stock.)
What's the difference between "Copy & edit" and "Use this formula"?
Copy & edit lands here on the Edit screen so you can change the duplicated formula before you weigh and apply it. Use this formula skips Edit and drops you on the Mix screen (Tutorial 20.12) to weigh against the unchanged plan.
Do I have to use the scale?
No. You can type each product's grams straight into its row instead of weighing. The scale just makes "pour to a number" faster and removes the mental arithmetic.
The customer is allergic to one of the products from last time — how do I swap it?
Tap the trash icon on the row, add the replacement product, then weigh or type its grams. The formula's lineage still traces back to the original.
Why can't I see "Edit formula" after the colour has been applied?
Once a formula is applied, it's locked — the hub offers Weigh leftovers instead, so you can record any leftovers before closing it out (Tutorial 20.13). If you genuinely need to change an applied formula, Revert it from the Mix screen first (Tutorial 20.12).
Can two stylists edit the same formula?
Avoid it — last save wins. Coordinate if you're working together on one colour.
Last Updated: April 2026