Introduction to Marketing Campaigns
Tutorial 19.1: Introduction to Marketing Campaigns
Introduction
Luminate's Campaigns feature lets you send targeted email and SMS marketing messages directly to your customers without leaving your salon management system. Whether you're promoting a seasonal offer, announcing a new service, or simply staying in touch with your regulars, campaigns make it easy to reach the right people with the right message.
This tutorial introduces the Campaigns page, explains how the campaign lifecycle works, and walks you through creating and sending your first email campaign from start to finish.
Who this is for: Salon owners and admins with the Manage Notifications permission.
What you'll learn:
- How to access the Campaigns page
- What the different campaign statuses mean
- How to search, filter, and sort your campaigns
- How to create a new email campaign step by step
- How the four-step campaign builder works (Details, Audience, Message, Review)
- The difference between Marketing and Transactional campaign types
Time to complete: 15-20 minutes
Prerequisites
Before you begin, make sure you have:
- A Luminate account with the Manage Notifications permission (owners and admins have this by default — see Tutorial 16.1 for role details)
- At least one active customer with an email address in your salon (see Tutorial 3.1 for adding customers)
- Familiarity with your salon's notification settings (see Tutorial 10.1 for an overview)
Step-by-Step Instructions
Step 1: Access the Campaigns Page
- Log in to Luminate and select your salon
- Click Campaigns in the sidebar navigation (look for the megaphone icon)
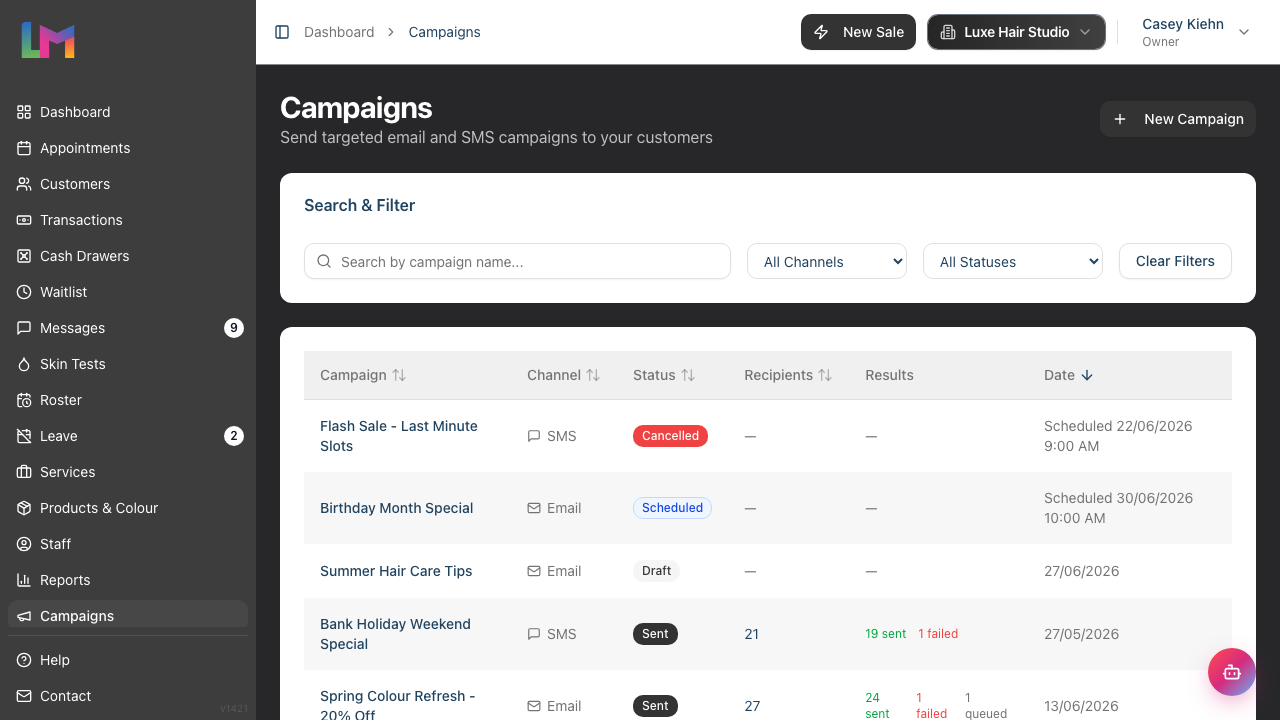
- You'll see the Campaigns index page with the heading "Campaigns" and the subtitle "Send targeted email and SMS campaigns to your customers"
If this is your first time here, you'll see an empty state message: "No campaigns yet" with a description reading "Create your first campaign to reach customers via email or SMS."
Step 2: Understand the Campaigns Index Page
The campaigns index page is your central hub for managing all campaigns. Here's what you'll find:
- New Campaign button (top right) — starts the campaign creation process
- Search bar — search by campaign name using the "Search by campaign name..." field
- Channel filter — filter by "All Channels", "Email", or "SMS"
- Status filter — filter by "All Statuses", "Draft", "Queued", "Scheduled", "Sending", "Sent", or "Cancelled"
- Campaign table — shows all your campaigns with sortable columns for Campaign, Channel, Status, Recipients, and Date, plus a Results column
Click any column header to sort. Click a campaign row to view its details.
Step 3: Understand Campaign Statuses
Every campaign moves through a lifecycle. Here are the statuses you'll encounter:
| Status | What It Means |
|---|---|
| Draft | The campaign is being created or edited. It hasn't been sent or scheduled yet. |
| Scheduled | The campaign is set to send at a specific future date and time. |
| Queued | The campaign has been submitted for sending and is being prepared for dispatch. |
| Sending | Messages are actively being delivered to recipients. |
| Sent | All messages have been processed. Check the delivery report for results. |
| Cancelled | The campaign was cancelled before all messages were sent. |
The typical flow is: Draft → Queued → Sending → Sent (for immediate sends) or Draft → Scheduled → Queued → Sending → Sent (for scheduled sends).
Step 4: Create a New Campaign
- Click the New Campaign button (or Create Your First Campaign if this is your first)
- You'll see the campaign builder with four steps shown at the top: Details, Audience, Message, and Review
Step 5: Fill in Campaign Details (Step 1 of 4)
The first step shows two cards: Campaign Details and Campaign Type.
In the Campaign Details card:
- Enter a Campaign Name — this is for your reference (e.g., "Summer Promotion", "VIP Loyalty Reward"). This field is required.
- Optionally add a Description (optional) — internal notes about the campaign's purpose. Customers won't see this.
- Choose a Channel — select Email or SMS. This determines how your message will be delivered.
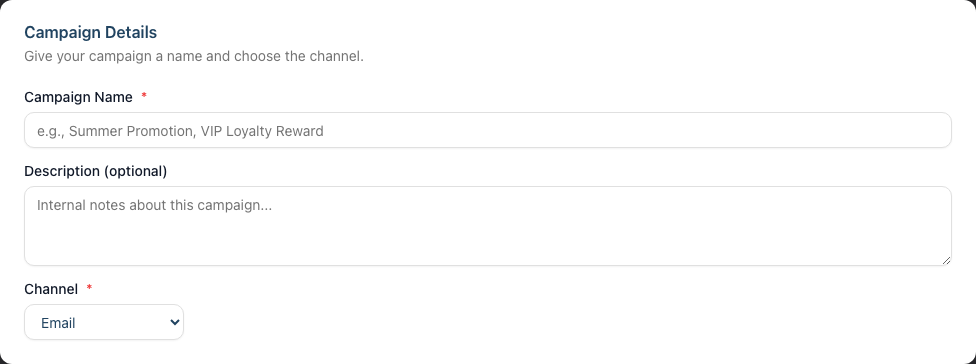
Note: The channel cannot be changed after the campaign is created.
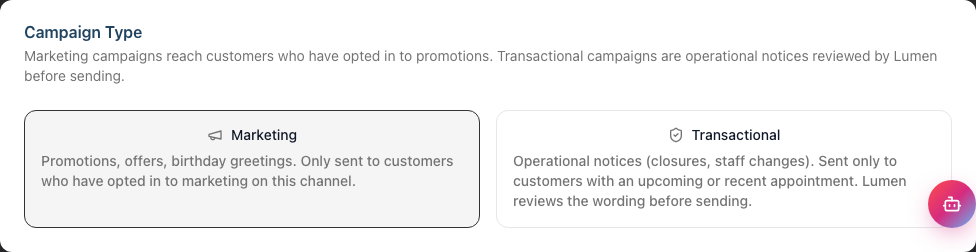
In the Campaign Type card, choose how the campaign is sent:
- Marketing (the default) — promotions, offers, and birthday greetings. Only sent to customers who have opted in to marketing on the chosen channel. This is the type covered by this tutorial.
- Transactional — operational notices such as closures or staff changes. Sent only to customers with an upcoming or recent appointment, and reviewed by Lumen (Luminate's AI assistant) before sending. See Tutorial 10.6 for a full walkthrough of transactional campaigns.
Click Next to proceed to the Audience step, or click Save Draft at any time to save your progress.
Step 6: Define Your Audience (Step 2 of 4)
The Target Audience step lets you add filters to narrow down who receives your campaign. We'll cover filters in detail in Tutorial 19.2, but here's the basics:
- Marketing consent is always enforced automatically. For marketing campaigns, Luminate only ever sends to customers who have opted in to marketing on that channel — email marketing consent for email campaigns, SMS marketing consent for SMS campaigns. This is required by law and cannot be turned off, so there is no consent filter to add or remove.
- The filter builder starts empty. To send to all consenting customers, simply leave it empty — you'll see the note "No filters added — the campaign will target all eligible email contacts" (or SMS contacts)
- To target a specific group, click Add Filter and choose from the available filter types
- As you add or change filters, the Estimated recipients count updates in real time, showing how many customers match your criteria

The estimate shows the number of customers with the required contact information (email address for email campaigns, phone number for SMS campaigns) who match all your filters.
Click Next to proceed to the Message step.
Step 7: Write Your Message (Step 3 of 4)
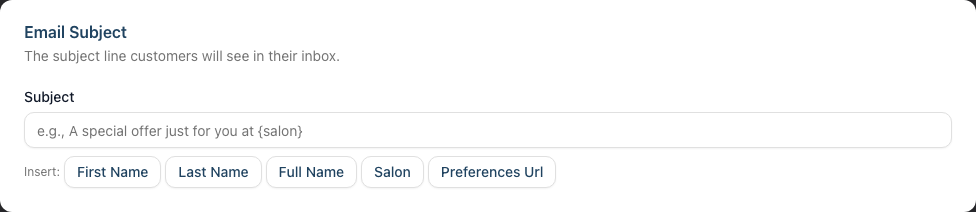
For an email campaign:
- Enter the Subject line — this is what customers see in their inbox (e.g., "A special offer just for you at {salon}")
- Use the Insert buttons below the subject field to add personalisation tokens: First Name, Last Name, Full Name, Salon, or Preferences Url
- Use the email editor below to compose your message body. The editor supports rich formatting with your salon's branding automatically applied
- Insert tokens into the body to personalise each message
For an SMS campaign:
- Compose your message in the text area. Keep it concise for the best open rates
- Use the Available Tokens panel on the right to click and copy tokens like
{first_name},{salon}, etc. - Note that "Send STOP to opt out" is automatically appended to every SMS campaign — you'll see this shown below the text area
- Watch the character count at the bottom to stay within the SMS segment limits (see Tutorial 19.4 for details)
Click Next to review your campaign.
Step 8: Review and Save (Step 4 of 4)
The Review Campaign step shows a summary of everything you've set up:
- Name and Description
- Channel (Email or SMS)
- Type (Marketing or Transactional)
- Subject (for email campaigns)
- Audience Filters — lists all active filters, or "All contacts who have opted in to email/SMS marketing" if no filters are set
- Est. Recipients — the number of matching customers
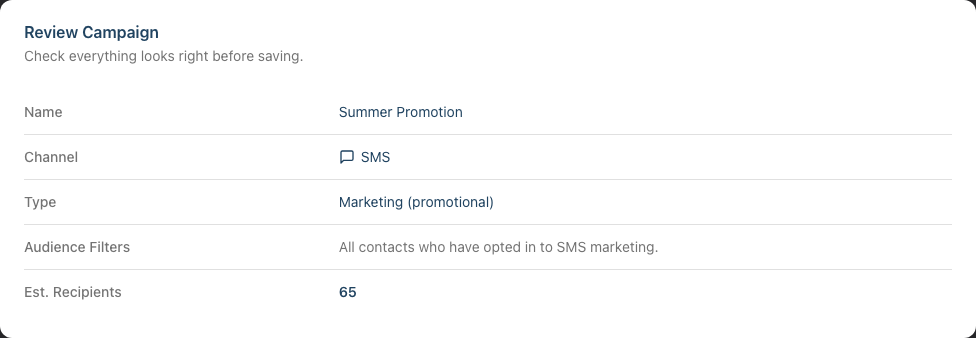
Review each item carefully. An info message reminds you: "Saving will create a draft. You can then send immediately or schedule the campaign from the campaign page."
When you're happy, click Save Draft (or Save Changes if editing an existing campaign). You'll be taken to the campaign's detail page where you can send or schedule it.
Common Pitfalls
"I can't find the Campaigns page in the sidebar"
The Campaigns feature requires the Manage Notifications permission. If you don't see it in the sidebar, ask your salon owner to check your role. Only owners and admins have this permission by default. See Tutorial 16.1 for details on roles.
"I chose the wrong channel and now I can't change it"
The channel (Email or SMS) is locked once the campaign is created. If you need a different channel, create a new campaign and delete the incorrect one. Draft campaigns can be deleted from the campaign detail page.
"My estimated recipient count shows zero"
This usually means no customers match your filter combination. Check that your customers have the required contact information (email addresses for email campaigns, phone numbers for SMS) and that they have marketing consent enabled. See Tutorial 3.3 for updating customer profiles.
Tips and Best Practices
- Start with a clear campaign name — use descriptive names like "February Half-Price Colour" or "VIP Christmas Offer" so you can find campaigns easily later
- Save drafts often — click Save Draft at any step to preserve your work. You can return to edit it later from the campaigns index
- Consent is handled for you — marketing campaigns only ever reach customers who have opted in on that channel, and this can't be switched off. You never need to add a consent filter yourself, and you can't accidentally message someone who hasn't opted in. Keep customer consent up to date in their profiles (see Tutorial 3.3)
- Use personalisation tokens — messages with the customer's first name feel more personal and get better engagement. At minimum, use
{first_name}in your greeting - Preview before sending — after saving your draft, visit the campaign detail page to preview your message exactly as customers will see it, including the email render or SMS text
Related Tutorials
- Tutorial 19.2: Targeting the Right Customers with Segment Filters — learn how to use all 13 filter types to build the perfect audience
- Tutorial 19.3: Sending, Scheduling, and Testing Campaigns — send test messages, schedule delivery, and manage your campaign
- Tutorial 19.4: SMS Campaigns and Credit Management — understand SMS segments, character limits, and credit costs
- Tutorial 10.6: Transactional Campaigns — send operational notices (closures, staff changes) that Lumen reviews before delivery
- Tutorial 10.1: Setting Up Appointment Reminders — understand Luminate's notification system
- Tutorial 10.5: SMS Balance and Usage Tracking — learn about SMS credit management if you're sending SMS campaigns
- Tutorial 3.3: Customer Preferences and Communication Consent — manage customer contact details and marketing consent
Frequently Asked Questions
Can I send a campaign to all my customers?
Yes, but only those with the appropriate contact information and marketing consent. Leave the audience filters empty to reach everyone who is eligible. Luminate always restricts marketing campaigns to customers who have both the required contact detail (an email address for email campaigns, a phone number for SMS) and marketing consent on that channel — this is enforced automatically and can't be switched off.
What's the difference between email and SMS campaigns?
Email campaigns support rich HTML formatting with your salon's branding, subject lines, and longer content. SMS campaigns are plain text, limited by character count, and use your SMS credit balance. SMS messages also have an automatic "Send STOP to opt out" footer appended. See Tutorial 19.4 for more on SMS specifics.
What's the difference between a Marketing and a Transactional campaign?
A Marketing campaign is promotional — offers, news, birthday greetings — and only reaches customers who have opted in to marketing on that channel. A Transactional campaign is for operational notices (a closure, a change of premises, a staff update) and is sent only to customers with an upcoming or recent appointment; Lumen reviews the wording before it can be sent to make sure it really is operational rather than promotional. This tutorial focuses on marketing campaigns — see Tutorial 10.6 for transactional campaigns in detail.
Can I edit a campaign after saving it?
Yes, as long as it's still in Draft status. Click the Edit button on the campaign detail page. Once a campaign has been sent or is currently sending, it can no longer be edited.
How many campaigns can I create?
There's no limit to the number of campaigns you can create. You can have as many drafts, scheduled, and sent campaigns as you need.
Who can see and manage campaigns?
Any team member with the Manage Notifications permission can create, edit, send, and view campaigns. This includes salon owners and admins by default. See Tutorial 16.1 for information about roles and permissions.
Last Updated: June 2026