Adding New Staff Members
Tutorial 4.1: Adding New Staff Members
Introduction
Adding staff members to Luminate allows you to manage your team, track their appointments and transactions, assign them to the roster, and calculate their compensation. This tutorial walks you through creating a complete staff profile with contact details, role assignment, staff level, and compensation settings.
Who this is for: Owner, Admin What you'll learn:
- Create a new staff profile
- Set contact details and employment information
- Assign a role (Admin, Manager, Staff, Receptionist)
- Configure compensation type (Hourly, Salary Only, Commission Only, Salary + Commission)
- Set staff level for tiered pricing
- Configure leave allowance and working days
- Control roster and appointment visibility
Time to complete: 10 minutes
Prerequisites
- Logged in as Owner or Admin
- Have the new staff member's details ready (name, email, phone)
- Know their role and compensation structure
Step-by-Step Instructions
Step 1: Access Staff Management
- Click Staff in the sidebar
- The staff list displays current team members
- Click the Add Staff Member button in the top-right corner
The "Add Staff Member" form is organised into a series of labelled sections, which this tutorial walks through from top to bottom.
Step 2: Enter Personal Information
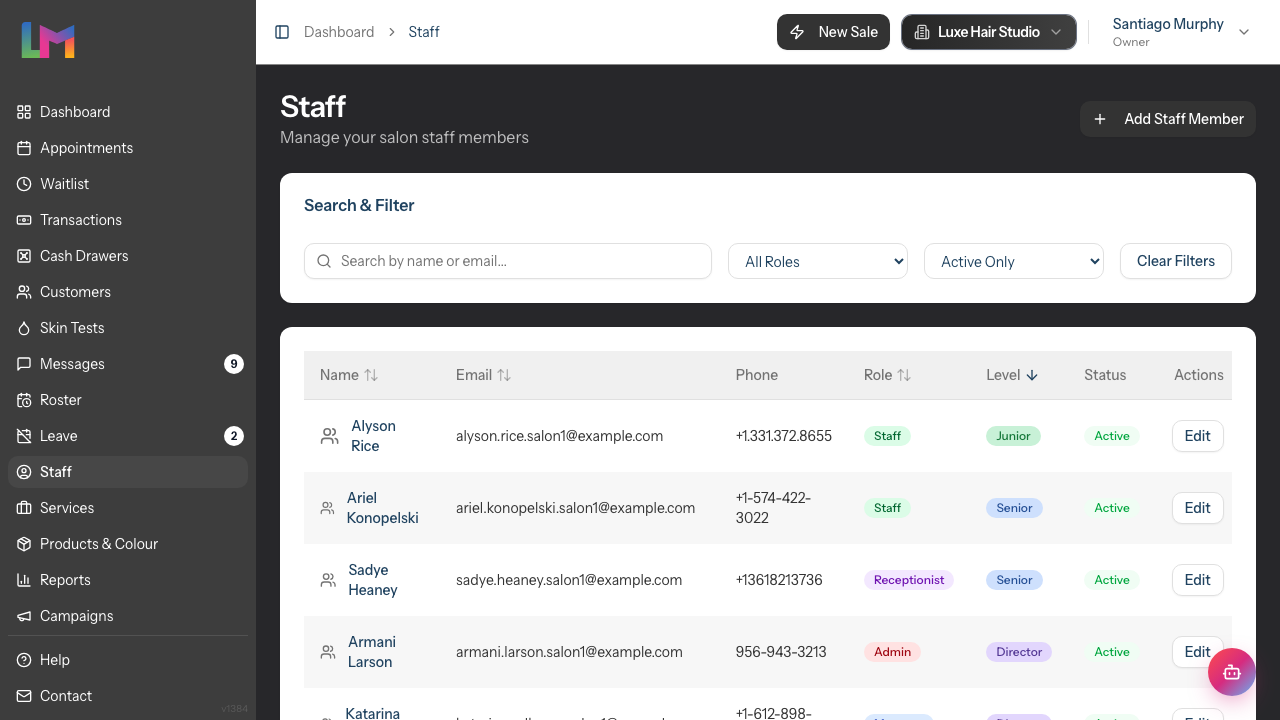
The first section captures contact details:
| Field | Required | Description |
|---|---|---|
| First Name | Yes | Given name |
| Last Name | Yes | Surname |
| Yes | Work email address | |
| Mobile Number | No | Phone with country code selector |
Entering Mobile Numbers:
- Click the country flag to select the correct country code
- Enter the phone number without leading zero
- Example: For UK number 07700 900123, select UK (+44) and enter "7700900123"
Step 3: Assign a Role
The Role section determines system permissions:
| Role | Description |
|---|---|
| Admin | Full system access except billing management |
| Manager | Operations access - roster, appointments, reports |
| Staff | Own schedule, assigned appointments, transactions |
| Receptionist | All schedules, bookings, customers, transactions (no services) |
Select the appropriate role from the dropdown. The role controls what the staff member can see and do when they log in.
Note: Receptionists are administrative staff who cannot be assigned to provide services. They won't appear in appointment booking staff selections.
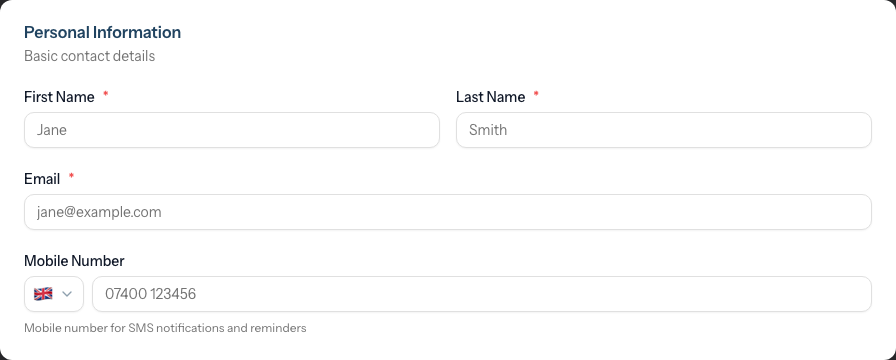
Step 4: Configure Scheduling Settings
The Scheduling section controls roster visibility and staff level:
Show on Roster & Appointments toggle: Controls whether this staff member appears on the roster schedule, in appointment booking dropdowns, and in the public online booking staff picker.
- Enabled (default for most roles): Staff member appears on the roster, can be scheduled for shifts, can be assigned to appointments, and is offered as a bookable stylist on the public online booking portal
- Disabled (default for Receptionists): Staff member is hidden from the roster, internal appointment selections, and the public online booking staff picker
Use cases for disabling this toggle:
- Receptionists and administrative staff who don't provide services
- Salon owners who don't take appointments themselves
- Managers who handle the floor but aren't on the chair
- Staff who are temporarily unavailable for scheduling
Note: Disabling this toggle does NOT delete existing shifts or appointments. They remain in the system — the staff member is simply hidden from future scheduling and from the online booking picker. This is also how you control whether a Manager-role staff member appears as bookable online: leave the toggle on if they take appointments, switch it off if they don't.
Where new staff appear: A newly added staff member is placed at the bottom of your calendar running order automatically. To move them higher, see Tutorial 4.6 — Setting Staff Display Order.
Staff Level (if configured): If your salon has staff levels set up, select from available levels (e.g., Junior, Senior, Director). Staff level affects pricing - services can have different prices per level. If you don't see this option, your salon doesn't have staff levels configured yet. See Tutorial 4.3.
Step 5: Set Employment Details
Enter the hire date:
- Click the Hire Date field
- Select the date from the calendar
- This is used for tenure tracking and reporting
Step 6: Choose Which Services This Person Offers
By default, every staff member is available for every active service — both on the calendar and in the public online booking portal. You can narrow this on a per-staff basis using the Services Offered In-Salon and Services Offered Online sections.
Note: These two grids only appear while the Show on Roster & Appointments toggle (in the Scheduling section) is enabled. A staff member who isn't on the roster can't be booked for services at all, so the choice doesn't apply to them.
Services Offered In-Salon:
This grid controls which services the staff member can be assigned to on the internal calendar. By default every service is selected.
- Untick a service to stop the staff member being booked for it on the calendar
- The counter shows how many of the salon's services they currently offer
- Receptionists and other staff cannot create a calendar booking pairing this person with a service that's been unticked here — the system will block it
Services Offered Online:
This grid controls which services this staff member appears for in the public booking portal. By default every service that's available online is selected.
- Untick a service to hide the staff member as an option for that service in the booking portal
- Customers picking that service in the portal will simply not see this staff member in the stylist list
- Services that are disabled at the salon level (in Salon Settings → Online Booking → Bookable Services) appear here greyed out — you can't override the salon-level setting from the staff page
- If you untick every service, a warning appears: this staff member won't appear at all in the public booking portal
Common patterns:
- A junior stylist who only does cuts and blowdries online but the full menu in-salon — leave everything ticked under "In-Salon", untick the colour and treatment services under "Online"
- A specialist who only does balayage — untick everything except balayage in both grids
- A stylist returning from leave who is not taking online bookings yet — untick all services under "Online", leave "In-Salon" fully ticked
These two grids are independent: a service ticked in-salon but unticked online means the staff member will be assignable to that service on the calendar but won't appear for it in the public portal.
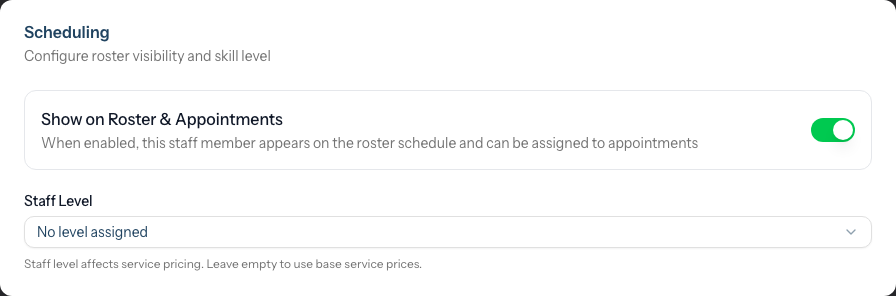
Step 7: Configure Compensation
The Compensation section adapts based on the type you select:
Compensation Type Selector: Choose how this staff member is paid:
| Type | Description |
|---|---|
| Hourly | Paid per hour worked |
| Salary Only | Fixed annual salary |
| Commission Only | Earnings from commission on services/products |
| Salary + Commission | Base salary plus tiered commission |
For Hourly:
- Enter Hourly Rate (e.g., 15.00)
For Salary Only:
- Enter Annual Salary (e.g., 30000.00)
For Commission Only:
- Enter Service Commission Override (%) for a flat rate on all service revenue
- OR leave blank to use per-service rates
- Enter Fallback Service Commission Rate (%) for services without their own rate
For Salary + Commission:
- Enter Annual Salary
- Configure Commission Tiers (percentage earned at different revenue thresholds)
Earns Product Commission toggle: At the bottom of the Compensation section, you'll find the Earns Product Commission toggle:
- Enabled: Staff member earns commission on product sales using each product's commission rate
- Disabled (default): Staff member does not earn commission on product sales
Products without a commission rate configured will not generate commission regardless of this setting.
Step 8: Set Monthly Targets (Optional)
The Monthly Targets section lets you set optional monthly goals for this staff member. Each target is shown to them on their My Performance page as a progress bar, measured against the current calendar month. Leave a field blank to skip that target.
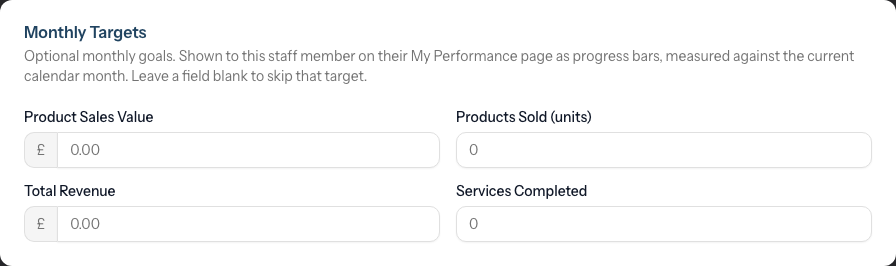
| Field | Description |
|---|---|
| Product Sales Value | Target value of product sales for the month |
| Products Sold (units) | Target number of product units sold |
| Total Revenue | Target total revenue (services and products) |
| Services Completed | Target number of services completed |
You can set any combination of these — they're entirely optional and don't affect compensation. They simply give the staff member visible goals to track against.
Step 9: Configure Leave Settings
The Leave Settings section controls annual leave allowance and working days:
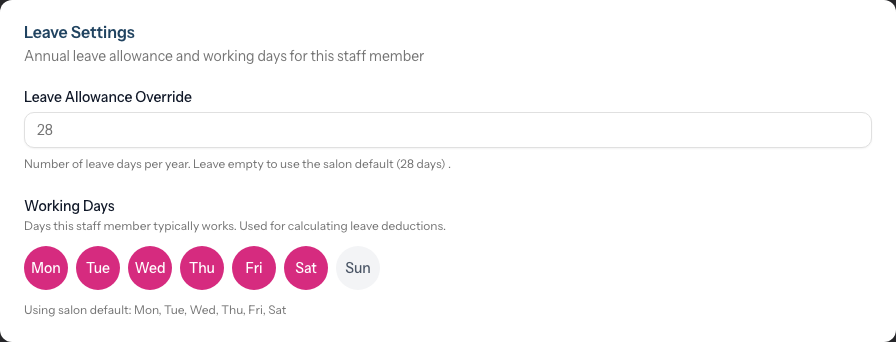
Leave Allowance Override:
- Enter Leave Allowance Override (number of days)
- Leave blank to use the salon default
The salon default is displayed below the field (e.g., "28 days").
Working Days: Select which days of the week this staff member typically works. This is used for calculating leave deductions - leave requests only count days the staff member is scheduled to work.
- Click on day buttons (Mon, Tue, Wed, Thu, Fri, Sat, Sun) to toggle them on or off
- Selected days appear highlighted
- By default, the salon's default working days are used (shown as "Using salon default")
- Once you customise working days, it shows "Custom" with your selections
- Click Reset to salon default to revert to the salon's default working days
Example: If a staff member only works Monday to Friday, deselect Saturday and Sunday. When they request a week's leave that spans a weekend, only 5 days will be deducted from their allowance instead of 7.
Step 10: Add Additional Information (Optional)
The Additional Information section captures supplementary details:
Qualifications: Record certifications, training, and specialisations.
NVQ Level 3 Hairdressing
Balayage Specialist Certification (2023)
L'Oréal Colour Expert
Notes: Internal notes about the staff member.
Available for overtime on Saturdays
Prefers not to work bank holidays
Step 11: Set Account Status
The final section is Status, which controls whether the staff member is active.
Active toggle:
- Enabled (default): Staff member appears in staff lists and selectors across the app and can be assigned to appointments
- Disabled: Staff member is hidden from staff lists and selectors, but their records are preserved
Use this when an employee leaves your salon — switch the toggle off rather than deleting the profile, so historical appointments, transactions, and reports remain intact.
Step 12: Save the Staff Member
- Review all entered information
- Click Create Staff Member
- You're redirected to the staff member's profile page
- A success message confirms the staff member was created
After Creating a Staff Member
Once the profile is created, you can:
- Create a login account - From the profile page, click Create Login Account (see Tutorial 4.2)
- Add to roster - Create shifts in the Roster section
- Assign to appointments - They'll appear in staff selection dropdowns
Common Pitfalls
"Email address is already taken"
Each staff member in your salon must have a unique email address. Check if this person already exists in your staff list.
"The compensation fields I expect aren't showing"
Different fields appear based on the Compensation Type selected. Change the compensation type to see the relevant fields.
"Staff member doesn't appear in appointment booking"
Check three things:
- The staff member is marked as Active
- The Show on Roster & Appointments toggle is enabled (in the Scheduling section)
- The role is not Receptionist (receptionists don't provide services by default)
"Staff member doesn't appear on the roster"
The staff member likely has the Show on Roster & Appointments toggle disabled. Edit their profile and enable this toggle in the Scheduling section to show them on the roster.
"Commission isn't calculating correctly"
For Commission Only staff, if no commission rate is set on the service AND no fallback rate is set on the staff member, commission will be zero. Set either service-level rates or a staff fallback rate.
Tips and Best Practices
- Start with the correct role - It's easier to increase permissions than reduce them
- Use accurate hire dates - This affects leave calculations and tenure reporting
- Set compensation accurately - Changes only affect future transactions, not historical records
- Record qualifications - Helps when assigning services and scheduling training
- Keep notes updated - Record availability preferences and special circumstances
- Don't delete, deactivate - When staff leave, switch off the Active toggle instead of deleting to preserve history
Related Tutorials
- Tutorial 4.2: Managing Staff Login Accounts - Creating system access
- Tutorial 4.3: Staff Levels and Experience Tiers - Setting up tiered pricing
- Tutorial 4.4: Tracking Staff Performance and Commission - Viewing reports
Frequently Asked Questions
Can I add staff without giving them system login?
Yes. Create the staff profile without creating a login account. You'll manage their appointments and roster for them. Add login access later if needed.
Can staff see other staff members' commission rates?
No. Staff members can only see their own compensation details. Only Owners and Admins can view all rates.
What's the difference between Hourly and Commission Only?
- Hourly: Paid based on hours worked, tracked in payroll
- Commission Only: Earnings are a percentage of services/products sold
How do I handle contractors or freelancers?
Create them as staff with Commission Only compensation. They'll appear in reports and can be assigned to appointments.
Can I change compensation type after creation?
Yes. Edit the staff profile and change the compensation type. Historical transactions remain unchanged.
What happens to appointments if I deactivate a staff member?
Existing appointments remain unchanged. The staff member won't appear for new bookings but their historical data is preserved.
Can staff edit their own profile?
Staff can view their profile but cannot edit compensation or role. Only Owners and Admins can modify staff profiles.
What does the "Show on Roster & Appointments" toggle do?
Found in the Scheduling section, this toggle controls whether a staff member appears on the roster schedule, in appointment booking dropdowns, and in the public online booking staff picker. When disabled, the staff member is hidden from all of these areas but their existing shifts and appointments remain in the system. By default, receptionists have this disabled because they don't provide services. This is also the single lever that controls whether a Manager-role staff member appears as bookable online.
I'm a salon owner who doesn't take appointments. Should I disable the toggle?
Yes. If you have a staff profile but don't want to appear on the roster or be bookable for appointments, disable the Show on Roster & Appointments toggle in the Scheduling section of your profile.
What are Working Days used for?
Working Days in the Leave Settings section determine which days count towards leave deductions. If a staff member only works Monday to Friday, weekend days won't be deducted from their leave allowance when they request time off.
Does everyone need to earn product commission?
No. The Earns Product Commission toggle is disabled by default. Enable it only for staff who should earn commission on product sales. Each product must also have a commission rate configured for the staff member to earn from it.
Last Updated: May 2026