
Setting Up Your Salon Profile
Tutorial 1.2: Setting Up Your Salon Profile
Introduction
Before you start booking appointments, let's get your salon set up properly. This tutorial covers adding your salon name, contact details, uploading your logo, and configuring essential settings like timezone, currency, tax rates, and date formats. We'll also explain why these settings matter for your day-to-day operations.
Who this is for: Salon owners and administrators setting up a new salon in Luminate.
What you'll learn:
- How to access and edit salon settings
- Setting up your business name and contact details
- Uploading your salon logo
- Configuring timezone, currency, tax settings, and date format
- Understanding how these settings affect your salon
Time to complete: 15-20 minutes
Prerequisites
Before you begin:
- You must be logged in as an Owner or Admin
- You should have your business details ready (address, phone, email)
- If uploading a logo, have it saved as a PNG or JPG file (recommended minimum: 500x500 pixels)
Step-by-Step Instructions
Step 1: Access Salon Settings
- Click your salon name in the header bar
- Select Salon Settings from the dropdown (owners also see a Manage Salons option, which opens the Salons list where you can click Edit next to a salon)
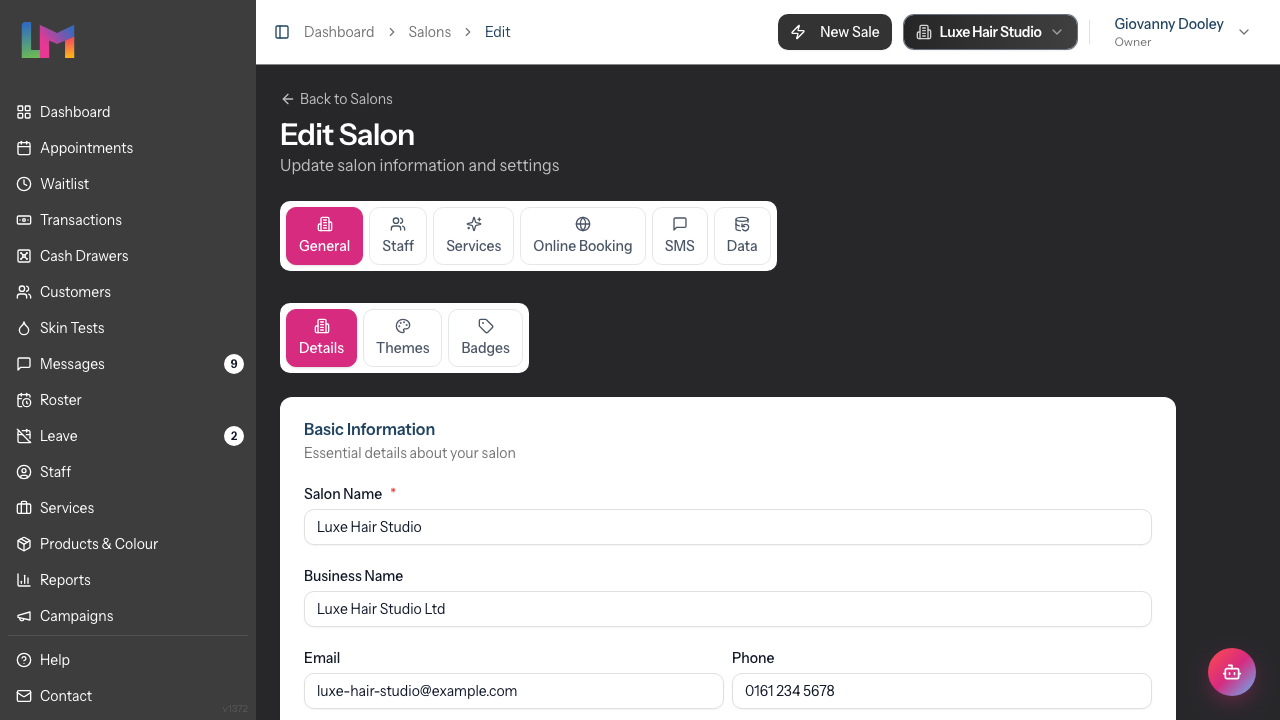
- You'll land on the Edit Salon page. It is organised into top-level tabs: General, Staff, Services, Online Booking, SMS, and Data
- The General tab is selected by default and has its own sub-tabs — Details, Themes, and Badges. Your salon profile lives under General → Details, which is shown automatically
Step 2: Set Your Salon Name and Business Name
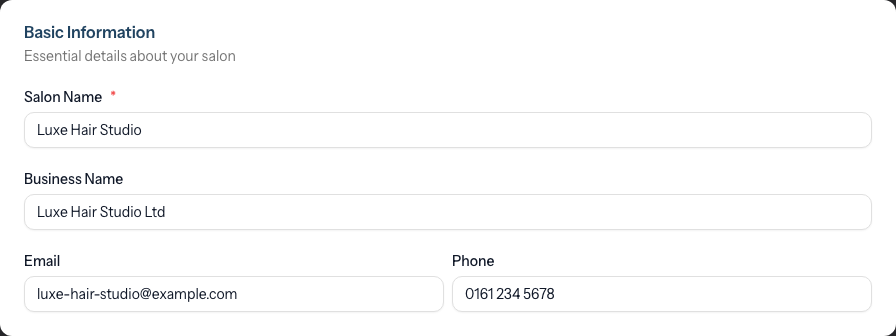
In the Basic Information card you'll find the first two fields:
Salon Name (required): This is the name customers see on communications and receipts. Keep it simple and recognisable.
Business Name: Your registered/legal business name for official documents. This may be different from your trading name.
- Enter your Salon Name (e.g., "Luxe Hair Studio")
- Enter your Business Name if different (e.g., "Luxe Hair Ltd")
- These names appear on receipts, emails, and customer communications
Example:
- Salon Name: "The Style Bar"
- Business Name: "Style Bar London Ltd"
Step 3: Add Contact Details
The Email and Phone fields sit in the Basic Information card, directly beneath the name fields. The remaining address fields are in the Location card below it.
| Field | Card | Description | Example |
|---|---|---|---|
| Basic Information | Primary contact email for customers | bookings@luxehair.example.com | |
| Phone | Basic Information | Main salon phone number | 020 7946 0958 |
| Country | Location | Select from the dropdown | United Kingdom |
| Street Address | Location | Your salon's street address | 123 High Street |
| City | Location | Town or city | London |
| County | Location | County or region | Greater London |
| Postcode | Location | Postal code | SW1A 1AA |
Address labels adapt to the selected country. When you choose a country, the address field labels update to match local conventions — for example, County becomes State in Australia or the US (and Province in Canada), Postcode becomes ZIP Code in the US, and the Channel Islands use Building Name / Road / Parish.
Why this matters:
- Email appears on receipts and customer communications
- Address is used for location-based features
- Phone number appears on appointment confirmations
Step 4: Upload Your Salon Logo
Your logo appears on:
- The login screen for your staff
- Receipt headers
- Customer-facing emails
- PDF exports
To upload your logo:
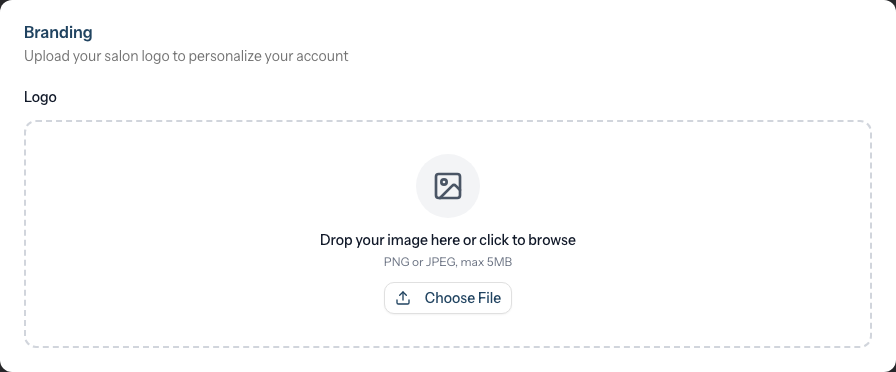
- Scroll down to the Branding card
- Drag and drop an image file onto the upload area (it reads "Drop your image here or click to browse"), or click Choose File to browse
- Once selected, a preview appears with an Image selected confirmation
- Your logo is saved when you click Update Salon at the bottom of the form
If a logo is already uploaded, you'll see it displayed with a Remove Logo button instead of the upload area.
Logo Guidelines:
- Recommended size: 500x500 pixels minimum
- Accepted formats: PNG or JPEG (the on-screen help text reads "PNG or JPEG, max 5MB")
- Maximum file size: 5MB
- Square logos work best; rectangular logos will be scaled to fit
- If possible, a transparent PNG image is recommended
Step 5: Configure Your Timezone
This setting is critical. Your timezone affects:
- How appointment times are displayed
- When reminders are sent
- Report date/time calculations
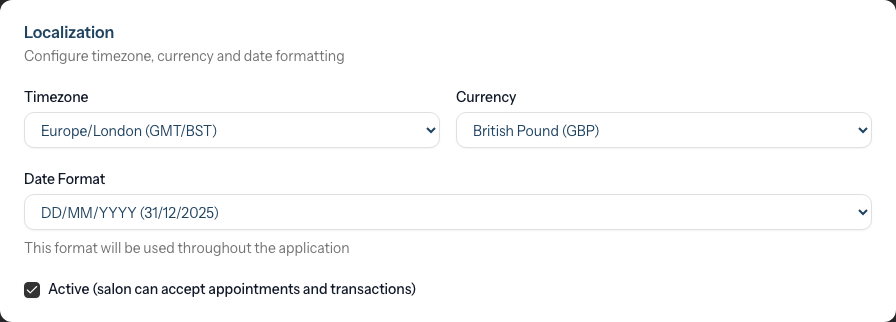
- Find the Localization card
- Select your local timezone from the Timezone dropdown (e.g., "Europe/London (GMT/BST)" for UK)
- Double-check this is correct before saving
Available Timezones:
- Australia/Sydney (AEST/AEDT)
- Australia/Melbourne (AEST/AEDT)
- Australia/Brisbane (AEST)
- Australia/Adelaide (ACST/ACDT)
- Australia/Perth (AWST)
- Pacific/Auckland (NZST/NZDT)
- America/New_York (EST/EDT)
- America/Los_Angeles (PST/PDT)
- America/Chicago (CST/CDT)
- Europe/London (GMT/BST)
- Europe/Paris (CET/CEST)
- Asia/Singapore (SGT)
- Asia/Tokyo (JST)
Common UK Timezone:
- Europe/London (GMT/BST - automatically adjusts for daylight saving)
Warning: If your timezone is wrong, appointments may show at incorrect times. Set this correctly before adding any appointments.
Step 6: Set Your Currency
The currency setting affects:
- How prices display throughout Luminate
- Receipt formatting
- Report exports
- In the Localization card, find the Currency dropdown
- Select your currency (e.g., "British Pound (GBP)")
Available Currencies:
- Australian Dollar (AUD)
- US Dollar (USD)
- Euro (EUR)
- British Pound (GBP)
- New Zealand Dollar (NZD)
- Canadian Dollar (CAD)
- Singapore Dollar (SGD)
- Japanese Yen (JPY)
Note: This is a display setting. It doesn't convert prices - it only changes the currency symbol shown.
The Active checkbox: The Localization card also contains an Active (salon can accept appointments and transactions) checkbox. Leave this ticked for a live salon. If you untick it, the salon becomes inactive and cannot be selected for bookings or transactions.
Step 7: Configure Tax Settings
Tax settings determine how tax is calculated and displayed on transactions, receipts, and invoices.
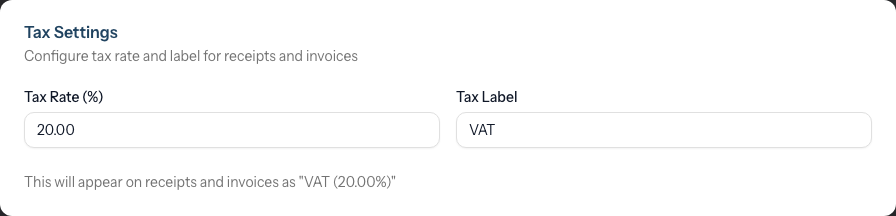
- Scroll to the Tax Settings card
- Enter your tax rate as a percentage in the Tax Rate (%) field (e.g., "20" for 20%)
- Set your Tax Label (e.g., "VAT" or "GST")
A helper line beneath the fields previews how the tax will appear on documents, e.g. "VAT (20%)".
Country-Specific Defaults:
When you select a country, Luminate automatically sets appropriate tax defaults. Only the UK and the Channel Islands have country-specific rates; every other country (including Australia, New Zealand, and the US) uses the standard default of 10% GST:
| Country | Tax Rate | Label |
|---|---|---|
| United Kingdom | 20% | VAT |
| Jersey | 5% | GST |
| Guernsey | 0% | GST |
| All other countries | 10% | GST |
Customising Tax Settings:
- The tax rate can be customised to any value between 0% and 100%
- The tax label appears on receipts and invoices (e.g., "VAT (20%)" or "GST (10%)")
- Settings are applied per salon, so multi-location businesses can have different tax rates
When to adjust:
- If your business is VAT-registered, use 20% VAT
- If operating in a tax-free jurisdiction, set to 0%
- If you have a different tax arrangement, enter your specific rate
Note: When you change the country, the tax rate and label may update automatically if the current values match the previous country's defaults. Custom rates you've set manually are preserved.
Step 8: Choose Your Date Format
Different regions display dates differently. Choose the format familiar to your team and customers.
- In the Localization card, find the Date Format dropdown
- Select your preferred format
Available Formats:
| Format | Example | Common In |
|---|---|---|
| DD/MM/YYYY | 31/12/2025 | UK, Europe, Australia |
| MM/DD/YYYY | 12/31/2025 | United States |
| YYYY-MM-DD | 2025-12-31 | International (ISO) |
| DD-MM-YYYY | 31-12-2025 | Alternative UK |
| DD.MM.YYYY | 31.12.2025 | Germany, Switzerland |
| Month Day, Year | December 31, 2025 | Formal documents |
| Day Month Year | 31 December 2025 | Formal UK |
| Day 31st Month Year | Mon 31st October 2025 | Friendly format |
| Day DD/MM/YY | Mon 31/10/25 | Compact UK |
| Day MM/DD/YY | Mon 10/31/25 | Compact US |
| Day YYYY-MM-DD | Mon 2025-10-31 | Compact ISO |
Tip: Choose a format your staff can read at a glance. The calendar and all dates throughout Luminate will use this format.
Step 9: Save Your Changes
- Review all settings to ensure they're correct
- Click Update Salon at the bottom of the form
- The button briefly changes to Salon Updated and a "Salon updated successfully!" confirmation message appears
Tip: The Update Salon button saves the whole form at once — including changes made on the Themes, Badges, Staff, and Services tabs. You don't need to save each tab separately.
Overview of the Other Tabs
The settings covered above all live under General → Details. The Edit Salon page has several other tabs you'll return to as you finish setting up. Here's a quick map; each area has its own dedicated tutorial later in the guides.
General (sub-tabs)
- Details — the profile settings covered in this tutorial
- Themes — choose your salon's colour theme
- Badges — turn appointment and customer badges on or off and create custom ones
Staff (sub-tabs)
- Roster — roster duplication limits
- Levels — staff levels (e.g., Junior, Senior) used for grouping and pricing
- Display Order — the order staff appear in on the calendar
- Leave — default leave allowance and carryover policy (see Section 6: Leave Management)
- Payroll — how payroll periods are cut (calendar month or a custom start day)
- Public Holidays — the public holidays observed by the salon
- Time Blocks — categories for non-bookable time (breaks, meetings, etc.)
Services — colour formula mode, colour charge rules, skin/colour test settings, and gift voucher defaults
Online Booking — your booking page address (slug), lead times, reschedule/cancel rules, and which services and staff are bookable online (see Section 18: Online Booking)
SMS — your SMS credit balance, top-up packs, and auto top-up settings (see Section 10: Notifications and Communication)
Data — export your salon or individual customer data (see Section 13: Salon Settings and Configuration)
Note on default working days: Each staff member's working days are set on their individual profile when you add or edit them (see Section 4: Staff Management). A new staff member starts from a salon-wide default of Monday to Saturday, which you can then adjust per person. This default is currently a behind-the-scenes value and is not edited from the salon settings screen.
Common Pitfalls
"Appointment times are wrong"
Your timezone is probably incorrect. Go back to Step 5 and verify your timezone setting. Remember: changing the timezone affects how times display, not the actual appointment slots.
"I set the wrong currency and now all my prices look wrong"
The currency setting only changes the symbol displayed - it doesn't convert prices. You can safely change it. Your actual price values remain unchanged.
"Staff can't access salon settings"
Only Owners and Admins can modify salon settings. Managers, Staff, and Receptionists cannot access the salon edit page. See Tutorial 1.3 for role details.
"My date format changed but old records look different"
The date format applies to how dates are displayed. It doesn't change any underlying data. All new displays will use your chosen format.
Tips and Best Practices
Set timezone before adding appointments - This prevents confusion later
Use a professional email address - Create a dedicated booking email (e.g., bookings@yoursalon.com) rather than personal email
Keep your logo simple - It will appear at various sizes; simple designs scale better
Match your date format to your receipts - If you're used to dd/mm/yyyy, stick with that for consistency
Complete all contact fields - These details may be used in customer communications and receipts
Review settings quarterly - Check that contact details are still accurate, especially after any business changes
Related Tutorials
- Tutorial 1.1: Welcome to Luminate - Navigation basics
- Tutorial 1.3: Understanding Roles and Permissions - Who can change settings
- Tutorial 1.4: The Onboarding Checklist - Complete your setup
- Tutorial 13.1: Salon Profile and Business Information - Advanced settings
- Tutorial 13.2: Timezone, Currency, and Regional Settings - Detailed configuration
Frequently Asked Questions
Can I change these settings later?
Yes, all settings can be changed at any time. However, we recommend setting timezone and date format correctly from the start to avoid confusion.
Do I need to add my address?
While not strictly required, adding your full address enables location features and ensures receipts display complete business information.
What happens if I don't upload a logo?
Luminate will use a default placeholder. Your salon will work fine, but adding a logo provides a more professional appearance.
Can I have different settings for different salons?
Yes! If you manage multiple salon locations, each salon has its own independent settings. Currency, timezone, and date format can all differ between locations.
Why does my currency need to match my Stripe account?
If you're processing payments through Stripe, your display currency should match your Stripe account currency to avoid customer confusion. The amounts are the same; only the symbol changes.
Can I use a GIF as my logo?
No, animated images are not supported. Use PNG or JPG format for your logo.
What's the difference between Salon Name and Business Name?
- Salon Name: Your trading name, used in customer-facing communications
- Business Name: Your legal/registered company name, used on official documents
For sole traders, these might be the same. For limited companies, the business name would be your registered company name.
How do I know what tax rate to use?
If you're VAT-registered in the UK, use 20% with the label "VAT". For Channel Islands businesses, Jersey uses 5% GST and Guernsey has 0% GST. For other countries, consult your local tax authority. When in doubt, speak to your accountant.
Will changing my tax rate affect existing transactions?
No, changing the tax rate only affects new transactions. Previously completed transactions retain their original tax calculations. This ensures your historical records remain accurate.
My salon is in a tax-free zone. What should I do?
Set your tax rate to 0%. This ensures no tax is added to transactions. The tax line will still appear on receipts showing "GST (0%)" or similar, confirming no tax was charged.
Why does Luminate change my tax settings when I change countries?
Luminate provides sensible defaults based on your country. When you change countries, if your current tax settings match the old country's defaults, they'll update to the new country's defaults. Custom rates you've manually set are preserved.
Last Updated: June 2026