
Setting Up Online Booking for Your Salon
Introduction
Online booking allows your customers to book appointments directly through a public booking page, available 24/7. Instead of calling during business hours or waiting for a response to an enquiry, customers can browse your services, choose their preferred stylist, select an available time slot, and confirm their booking instantly.
This tutorial walks you through enabling online booking for your salon, creating your unique booking URL, and understanding the key settings that control how the booking system works.
Who this is for: Salon owners and administrators who want to offer online booking to their customers.
What you'll learn:
- How to enable online booking for your salon
- Creating and customising your booking URL
- Understanding the booking page settings
- How to share your booking link with customers
- How to find deposit collection settings for online bookings
Time to complete: 10-15 minutes
Prerequisites
Before you begin, make sure you have:
- Owner or Admin access to your salon
- At least one active service configured (see Tutorial 7.1: Creating and Managing Your Service Menu)
- At least one active staff member with a roster (see Tutorial 4.1: Adding New Staff Members)
Step-by-Step Instructions
Step 1: Access Online Booking Settings
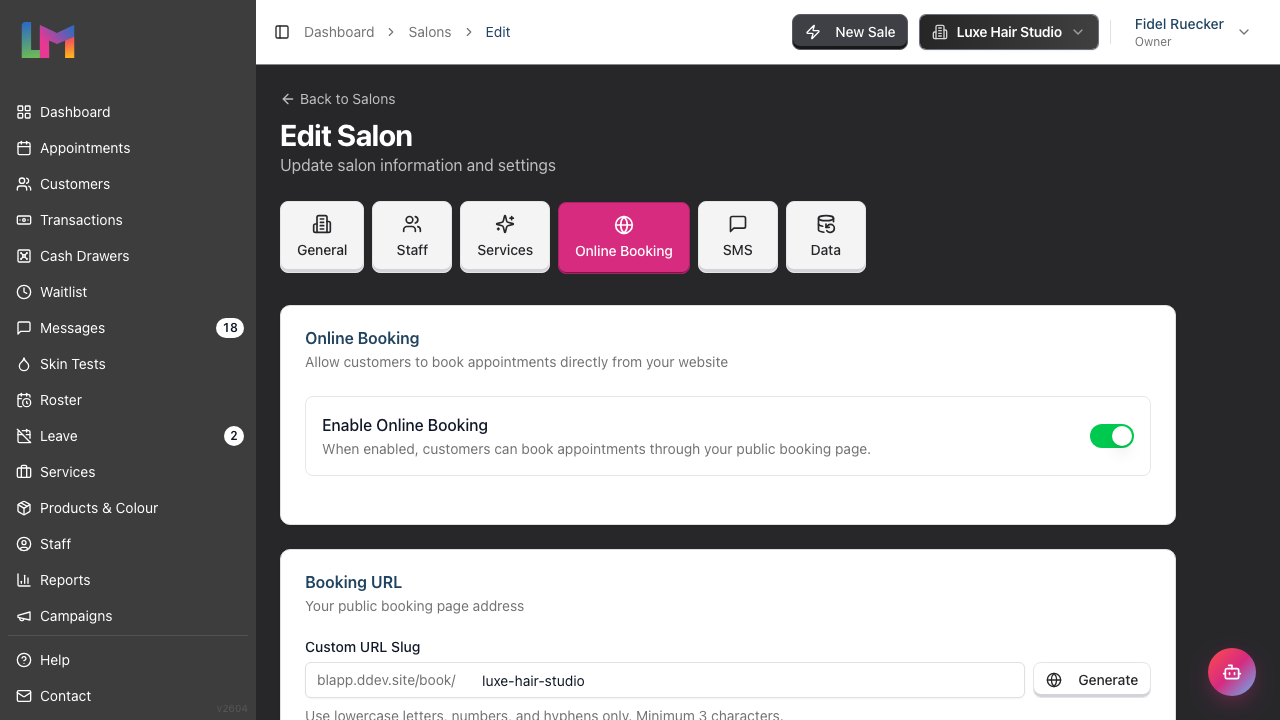
- Click your salon name in the header bar
- Select Salon Settings from the dropdown menu
- Click the Online Booking tab at the top of the settings page
You'll see the online booking configuration panel with several sections.
Step 2: Enable Online Booking
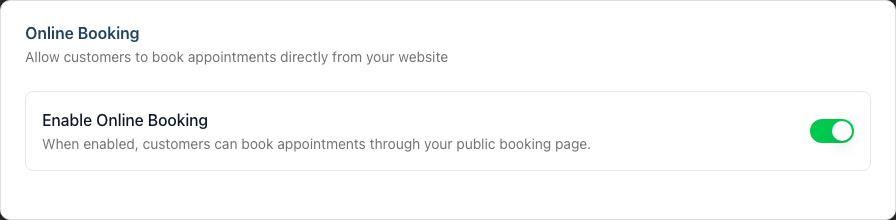
- Find the Online Booking section at the top
- Toggle the Enable Online Booking switch to the on position
- When enabled, the switch will show as active (highlighted)
What this does:
- Makes your public booking page accessible to customers
- Allows customers to browse services and book appointments
- The booking URL becomes active and functional
Step 3: Set Up Your Booking URL
Every salon needs a unique URL slug for their booking page. This creates a memorable web address customers can use to book.
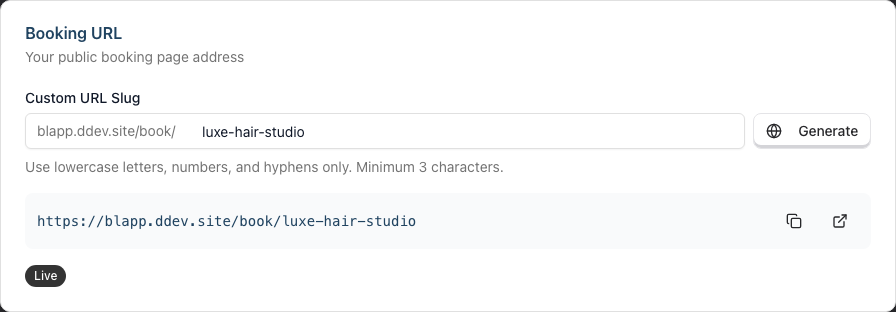
- In the Booking URL section, find the Custom URL Slug field
- Enter a short, memorable name using only:
- Lowercase letters (a-z)
- Numbers (0-9)
- Hyphens (-)
- The slug must be between 3 and 50 characters long
The field tidies what you type as you go: capital letters become lowercase, spaces become hyphens, and any other character is dropped.
Example URLs:
luxe-hair-studiocreateshttps://app.luminate.salon/book/luxe-hair-studiodowntown-cutscreateshttps://app.luminate.salon/book/downtown-cutshair-by-sarahcreateshttps://app.luminate.salon/book/hair-by-sarah
Using the Generate Button: Click Generate to automatically create a URL slug based on your salon name. The system will convert your salon name to a URL-friendly format (lowercase, spaces replaced with hyphens).
Step 4: Verify Your URL is Available
Once you have typed at least 3 characters, Luminate checks whether your chosen slug is available. An indicator appears at the right-hand end of the field:
- A green tick indicates the URL is available
- A red cross indicates you cannot use the URL - it is already taken, or longer than 50 characters. Choose a different slug
- A loading spinner appears while checking
Once you see a green tick, your URL is ready to use.
Step 5: Preview Your Booking URL
Below the slug input, you'll see:
- A preview of your full booking URL
- A copy button to copy the URL to your clipboard
- An external link button to open the booking page in a new tab (only visible when online booking is enabled)
- A status badge showing Live (when enabled) or Disabled
If you haven't entered a slug yet, a reminder reading "Set a URL slug to enable the booking page" appears next to the badge.
Step 6: Save Your Settings
- Scroll to the bottom of the settings page
- Click Update Salon
- A Success message reading "Salon updated successfully!" appears, and the button briefly changes to Salon Updated
The page stays on the Online Booking tab after saving, so you can carry on configuring the rest of your booking settings (see Tutorial 18.2).
Step 7: Setting Up Deposit Collection (Optional)
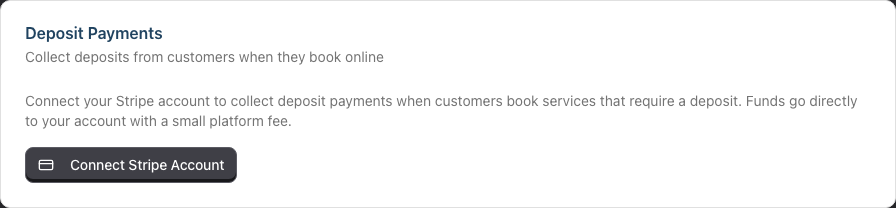
If you want to collect deposits when customers book online, you'll need to connect a Stripe account. The Deposit Payments card sits directly below the Booking URL card on the same Online Booking tab. Click Connect Stripe Account to begin onboarding. For full setup instructions, see Tutorial 18.5: Collecting Online Booking Deposits with Stripe.
Only the salon owner can connect, open or disconnect the Stripe account. Administrators see the card with a note explaining that the salon owner sets this up.
Testing Your Booking Page
After saving, test your booking page to ensure everything works correctly:
- Click the external link icon next to your booking URL, or
- Copy the URL and paste it into a new browser tab
- You should see your salon's booking page with:
- Your logo, or your business name if you haven't uploaded a logo
- The heading Book Appointment
- A five-step progress bar with the first step highlighted
- The first step, Let's get you booked in, asking for the customer's email address
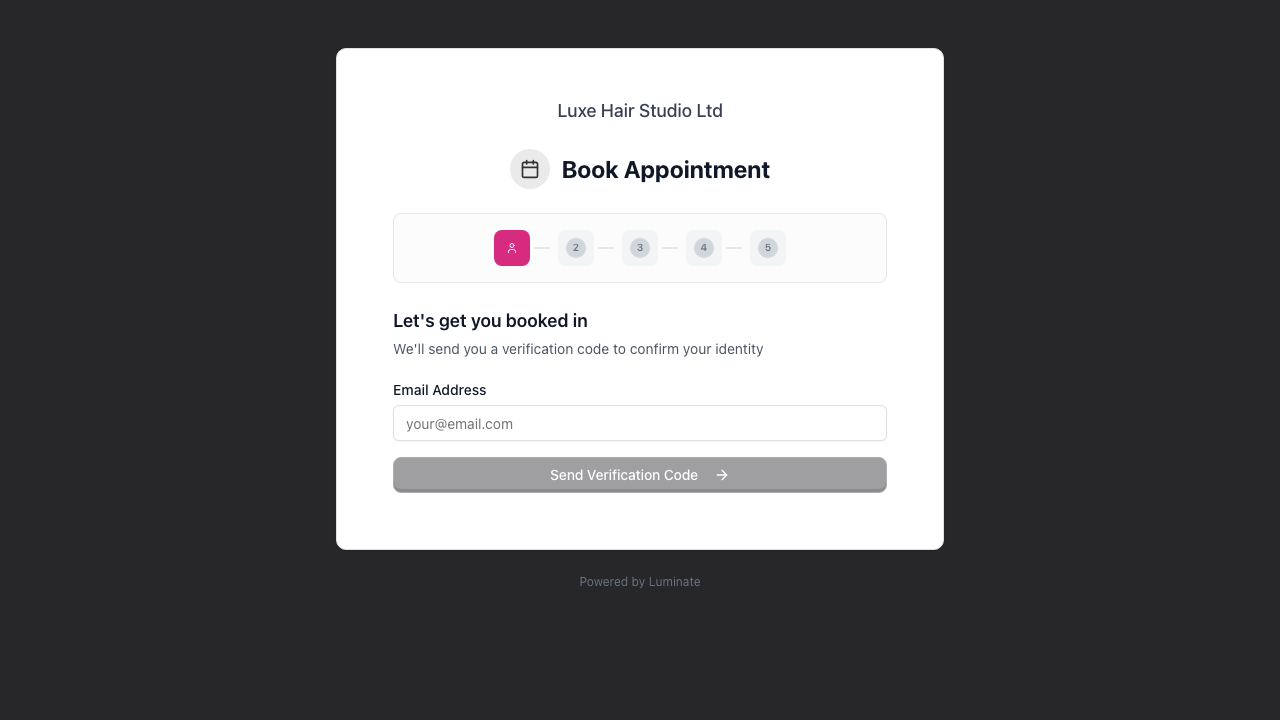
Customers verify their identity before they choose anything, so your services appear at step 2 rather than on the first screen. To check the full journey, enter your own email address and follow the verification code through. Tutorial 18.3 walks through every step in detail.
Sharing Your Booking Link
Once your booking page is live, share it with customers through:
Your Website: Add a "Book Now" button that links to your booking URL
Social Media: Include the link in your Instagram bio, Facebook page, or other social profiles
Email Signatures: Add the booking link to staff email signatures
Text Messages: Send the link directly to customers when they enquire about appointments
QR Codes: Generate a QR code from your booking URL for printed materials, window displays, or business cards
Common Pitfalls
"My booking URL shows Booking Page Not Found"
Check that the Enable Online Booking switch is turned on and you've clicked Update Salon to save the changes. Also check the slug in the link matches the one in the Custom URL Slug field. If you changed your slug, the old link stops working.
"Customers can't see any services"
Services must be marked as available for online booking. By default, all new services are available. Check that you have active services configured and that they haven't been disabled for online booking. You can manage which services appear on your booking page from Salon Settings > Online Booking tab (see Tutorial 18.2).
"No time slots are available"
This usually means:
- Staff don't have roster shifts covering the dates customers are trying to book
- The minimum lead time setting is preventing same-day bookings
- All available slots are already booked
See Tutorial 18.2 for details on configuring availability settings.
"The URL slug I want is taken"
Each booking URL must be unique across all salons. Try adding your location, a number, or variation to create a unique slug (e.g., luxe-hair-london or luxe-hair-2).
Tips and Best Practices
Keep your URL short and memorable - Customers may need to type it or remember it.
luxe-hairis better thanluxe-hair-studio-london-branch-1.Test on mobile devices - Most customers will book from their phones. Open your booking page on a mobile device to check the experience.
Set up before promoting - Configure all your settings (see Tutorial 18.2) before widely sharing your booking link.
Add services gradually - If you're new to online booking, start by enabling only your most popular services. You can control which services appear on your booking page from the Online Booking tab in Salon Settings or from each service's settings page.
Monitor your bookings - After launching, keep an eye on incoming online bookings to ensure the system is working as expected.
Related Tutorials
- Tutorial 18.2: Managing Your Online Booking Settings - Configure constraints and self-service options
- Tutorial 18.3: The Customer Booking Experience - Understanding what customers see
- Tutorial 18.4: Customer Self-Service - How customers manage their bookings
- Tutorial 18.5: Collecting Online Booking Deposits with Stripe - Set up deposit collection
- Tutorial 7.1: Creating and Managing Your Service Menu - Setting up services for booking
- Tutorial 5.1: Setting Up Your Weekly Roster - Ensuring availability
Frequently Asked Questions
Can I have different booking URLs for different services?
No, each salon has one booking URL. All services marked as available for online booking appear on that page. You can control which services appear from Salon Settings > Online Booking tab or from each service's settings (see Tutorial 18.2). Customers can select multiple services in a single booking.
What happens if I disable online booking?
Your booking URL stops working. Anyone who opens it sees a Booking Page Not Found page telling them to check the link or contact the salon directly. Existing bookings are not affected - only new bookings are prevented.
Can customers book without verifying their email or phone?
No, all customers must verify their identity with a one-time code before they can book. The code goes to their email address. You can also let customers verify by text message instead - turn on Enable SMS Verification in the SMS Verification card on the same Online Booking tab (see Tutorial 18.2). Verification prevents fake bookings and ensures you have valid contact details.
Does the booking page work on mobile?
Yes, the booking page is fully responsive and optimised for mobile devices. Most customers will book from their phones.
Can I customise the appearance of my booking page?
Your logo is the part you control. Upload one in the Logo field on the General tab of Salon Settings, under Details, and it appears at the top of the booking page in place of your business name. Everything else uses Luminate's standard booking page design. The theme colour you choose for the app does not carry over to the public booking page.
What timezone is used for the booking page?
The booking page uses your salon's configured timezone. Customers see available times in your local timezone, regardless of where they're located.
Is the booking URL case-sensitive?
No, booking URLs are not case-sensitive. luxe-hair-studio and LUXE-HAIR-STUDIO will both work.
Can I require customers to pay a deposit when they book online?
Yes. If you connect a Stripe account and configure deposit requirements on your services, customers will be asked to pay a deposit during the booking process. See Tutorial 18.5 for full setup instructions.
Last Updated: August 2026