
Importing and Exporting Data
Introduction
Whether you're backing up your salon data, responding to a customer's data request under GDPR, preparing reports for your accountant, or migrating from another system — Luminate gives you several ways to get data in and out. This guide covers the Data Export tool for full salon and individual customer exports, report exports to CSV and PDF, transaction document downloads, and the bulk import process for new salons.
Who this is for: Salon owners and administrators who need to export data for backup, compliance, accounting, or analysis.
What you'll learn:
- How to create full salon and individual customer exports
- Choosing between JSON and CSV formats
- Exporting reports to CSV and PDF
- Downloading transaction invoices and receipts
- Understanding the bulk data import process
Time to complete: 15-20 minutes
Prerequisites
Before you begin:
- You must be logged in as an Owner or Admin (the
export-reportspermission is required) - Access to the Settings page (for data exports) and Reports section (for report exports)
- A web browser that can download files
Step-by-Step Instructions
Step 1: Access the Data Export Tool
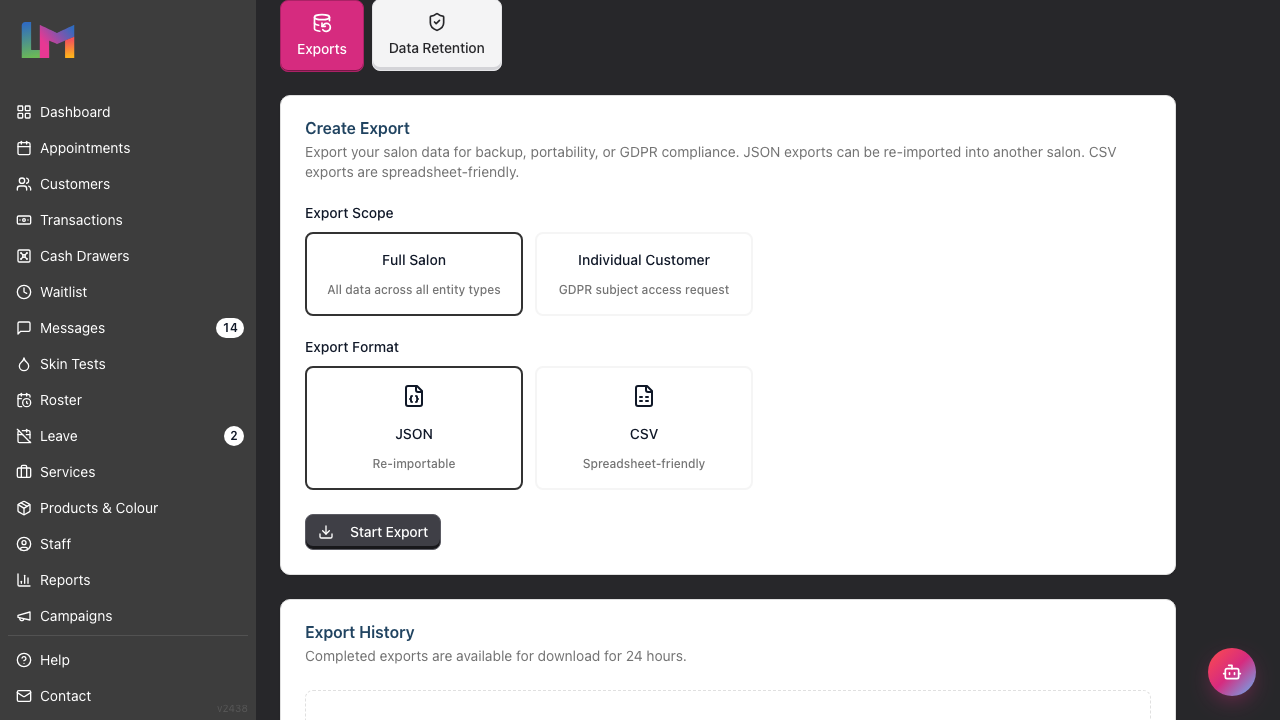
The Data Export tool lets you export all your salon data or an individual customer's data as a downloadable ZIP file.
- Click Settings in the sidebar
- Select the Data tab
- The Data tab is split into two sub-tabs: Exports and Data Retention. It opens on Exports — that's the one you want here. (Data Retention is the automatic-anonymisation policy, covered in Tutorial 11.3.)
- On the Exports sub-tab you'll see two sections: Create Export at the top and Export History below
Step 2: Create a Full Salon Export
A full salon export packages all your data into a single ZIP file — ideal for backups or migrating to a new salon.
- Under Export Scope, select Full Salon
- Under Export Format, choose your format:
- JSON — Structured data that can be re-imported into another Luminate salon. Best for backups and migration.
- CSV — Spreadsheet-friendly files that open in Excel or Google Sheets. Best for analysis or sharing with your accountant.
- Click Start Export
- The export begins processing in the background — you can navigate away and come back later
What's included in a full salon export:
| Data Type | What's Exported |
|---|---|
| Staff Levels | Names, colours, sort order, active status |
| Staff | Names, compensation details, rates, commission bands, monthly targets, roster settings and working days, hire dates, qualifications |
| Customers | Contact information, preferences, allergies, referral source, badges, marketing consent, account credit balance and history |
| Tags | Names, types, colours |
| Services | Pricing, durations, commission rates, staff level pricing variants, deposit rules, online-booking availability, colour-service grams allowance |
| Products | SKU, barcode, pricing, stock levels, expiry dates, and the full colour catalogue — brand, line, shade family, shade code, product role, gram tracking and gram stock |
| Appointments | Times, statuses, deposits, consultation notes, cancellation reasons |
| Transactions | Amounts, line items, payment methods, linked appointments |
| Shifts | Staff schedules with break durations |
| Time Blocks | Non-appointment calendar blocks — holidays, training, meetings — with their categories |
| Colour Tests | Test results, medical/safety notes, consent records and the signed signatures (JSON exports only) |
| Gift Vouchers | Values, codes, recipient details, expiry dates |
Only one full salon export can run at a time. If an export is already in progress, the Start Export button will be disabled with a message explaining why.
Step 3: Create an Individual Customer Export
Individual customer exports are designed for GDPR Subject Access Requests — when a customer asks for a copy of all data you hold about them.
- Under Export Scope, select Individual Customer
- A search box appears — type the customer's name, email, or phone to find them
- Select the customer from the results
- Choose your format (JSON or CSV)
- Click Start Export
What's included in a customer export:
| Data Type | What's Exported |
|---|---|
| Customer Record | Full profile, contact details, preferences, badges, consent, account credit balance and history |
| Appointments | All appointments for this customer |
| Transactions | All transactions for this customer |
| Colour Tests | All colour test records for this customer |
| Gift Vouchers | All vouchers purchased by this customer |
You can also start a customer export directly from the customer's profile page: find Export Customer Data and click Export Data. It links straight to Settings > Data > Exports with that customer already selected. The shortcut only appears for Owners and Admins, because only they can open the Data tab.
Step 4: Track Export Progress
Exports run in the background and you can monitor their progress in the Export History table.
- After starting an export, scroll down to the Export History section
- Each export shows a status badge:
- Pending — Waiting to start
- Processing — Currently running (shows which data type is being exported and a percentage)
- Completed — Ready to download
- Failed — Something went wrong (hover over the error icon for details)
- The page updates automatically — no need to refresh
Step 5: Download Your Export
Once an export completes:
- Find the export in the Export History table
- Click the Download button
- A ZIP file downloads to your browser's default download location
File naming: Downloads are named automatically:
luminate-salon-export-your-salon-name-2026-04-03.zip(full salon)luminate-customer-export-your-salon-name-2026-04-03.zip(individual customer)
Important: Completed exports are available for download for 24 hours. After that, the file is automatically deleted. The Expires column shows how much time remains.
Step 6: Manage Export History
The Export History table shows all your exports with their type, format, status, creation date, file size, and expiration time.
To delete an export:
- Click the bin icon next to the export
- Confirm deletion in the dialog that appears
- The export and its file are permanently removed
Step 7: Understanding JSON vs CSV Exports
| JSON | CSV | |
|---|---|---|
| Best for | Backups, migration to another salon | Spreadsheets, accounting, analysis |
| Re-importable | Yes — can be imported into a new Luminate salon | No |
| Opens in | Text editors, JSON viewers | Excel, Google Sheets, Numbers |
| Nested data | Included naturally (e.g., transaction items inside transactions) | Separate files (e.g., transactions.csv + transaction_items.csv) |
| File structure | One file per entity type + manifest | One or more files per entity type + manifest |
| Signed signatures | Included on colour test records | Left out — a signature image is far too long for a spreadsheet cell and would open truncated |
Both formats produce a ZIP file containing your data files plus a manifest.json that lists what's included and record counts.
Dates and times in both formats are written in your salon's own timezone, not UTC — so a late-evening appointment stays on the day you'd expect rather than sliding into the previous date.
Step 8: Export Reports to CSV or PDF
Individual reports can be exported directly from the Reports section — useful for sending specific data to your accountant or creating periodic records.
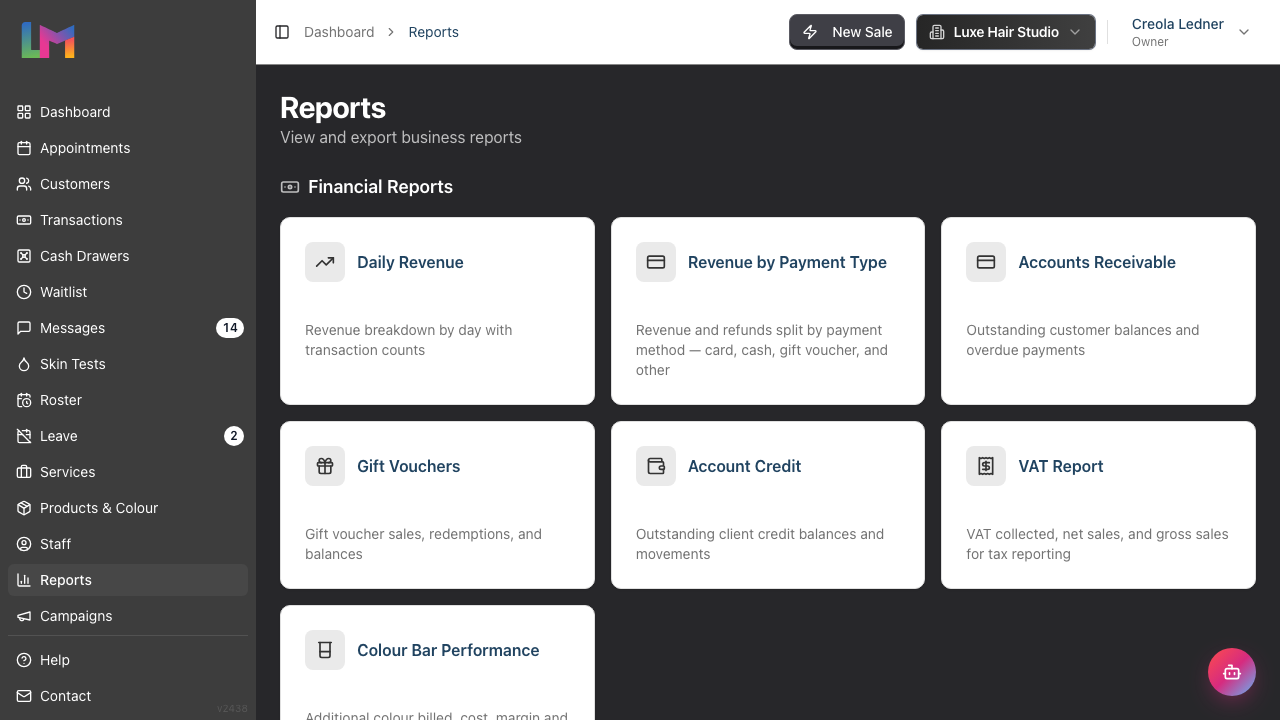
- Click Reports in the sidebar
- Choose a report from one of the grouped categories:
- Financial Reports — Daily Revenue, Revenue by Payment Type, Accounts Receivable, Gift Vouchers, Account Credit, VAT Report, Colour Bar Performance
- Customer Reports — Top Customers
- Staff Reports — Staff Performance, Staff Commission, Hours Worked, Payroll, Leave Report
- Messaging Reports — SMS Usage
- Inventory Reports — Colour Stock & Reorder
- Set the date range using the date selector
- Review the data on screen
- Click the Export button near the table heading
- Choose your format:
- Export as CSV — Opens in Excel or Google Sheets
- Export as PDF — Formatted document for printing or sharing
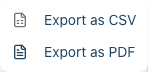
Every report offers both formats, and both do what they say — pick CSV when you want to work with the figures in a spreadsheet, PDF when you want something to print, file or send on.
| Report | Data Included | Formats |
|---|---|---|
| Daily Revenue | Date, transactions, service revenue, product revenue, subtotal, discounts, tax, revenue, tips | CSV, PDF |
| Revenue by Payment Type | Payment method, transactions, collected, refunded, net amount, % of total | CSV, PDF |
| Accounts Receivable | Customer name, email, phone, unpaid transactions, outstanding balance, oldest invoice, days overdue | CSV, PDF |
| Gift Vouchers | Code, status, initial value, current balance, value forfeited, customer, recipient name/email, issued/expiry dates, transaction ID | CSV, PDF |
| Account Credit | Name, balance, last movement, number of movements — every customer currently holding credit | CSV, PDF |
| VAT Report | Period, transactions, net sales, tax amount, gross sales | CSV, PDF |
| Colour Bar Performance | Colourist summary (formulas finalised, bowls re-weighed, reweigh coverage, additional billed, colour cost); per-charge detail (date, customer, service, overage grams, rule applied, cost, charged, margin) | CSV, PDF |
| Top Customers | Customer name, email, phone, total spend, visits, average spend, last visit, first visit | CSV, PDF |
| Staff Performance | Staff name, role, transactions, items, service revenue, product revenue, total revenue, tips, commission | CSV, PDF |
| Staff Commission | Staff member, compensation type, commission band breakdown, and per-transaction commission detail (date, type, description, quantity, subtotal, rate, commission earned) | CSV, PDF |
| Hours Worked | Staff name, role, shift count, scheduled hours, working hours, break hours | CSV, PDF |
| Payroll | Staff Member, Compensation Type, Scheduled Hours, Actual Hours, Service Revenue, Product Revenue, Total Revenue, Base Pay, Commission, Tips, Gross Pay, Adjustments, Net Pay, Status | CSV, PDF |
| Leave Report | Staff member, role, allowance, used, pending, remaining days, plus breakdown by leave type | CSV, PDF |
| SMS Usage | Date, type, reason, SMS type, amount, balance, customer (individual view); or date, credits added/used, net change, transactions (daily view) | CSV, PDF |
| Colour Stock & Reorder | Brand, product line, shade, product, role, tube size, stock on hand, current tubes, average daily usage, days to stockout, reorder status | CSV, PDF |
Some reports offer different views that affect what's exported. For example, the SMS Usage report can be viewed as individual entries or daily totals — the export matches whichever view you're currently looking at.
Report export files are named with the report type and date range, e.g., daily-revenue-2026-01-01-to-2026-03-31.csv.
Payroll is the exception. Because salons pay staff from these files, the payroll export names itself after the period rather than a filter range, and marks anything not yet locked:
- A plain calendar month gets the short name —
payroll-2026-08.csv - Any other shape (a 26 Jul – 25 Aug cycle, or a short bridge period) carries its explicit dates —
payroll-2026-08-20260726-20260825.csv - A period that hasn't been finalised gets a
-DRAFTsuffix, and every row carries a Status column
That combination is deliberate: two overlapping draft periods can both be exported, and the DRAFT marker is what stops someone paying the overlap twice. Check for it before you pay from a file.
Step 9: Download Transaction Documents
Individual transactions can be downloaded as PDFs in two formats. When viewing a transaction, you'll see tabs along the top: Details, Invoice, Receipt (plus a Rebook tab on completed transactions that are linked to a customer).
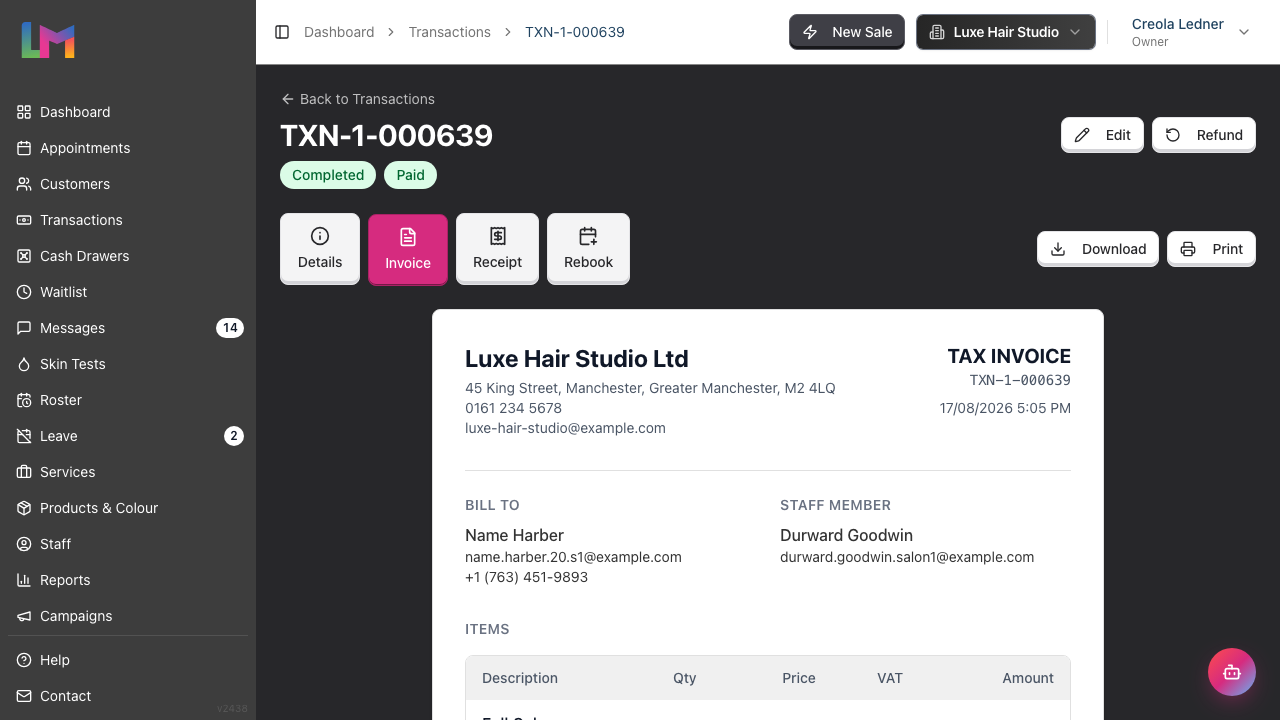
Invoice (A4 format):
- Go to Transactions in the sidebar
- Find the transaction in the list and click View
- Click the Invoice tab
- Click the Download button in the top-right (or Print to send straight to a printer)
Receipt (thermal printer format, 80mm width):
- Open the transaction as above
- Click the Receipt tab
- Click the Download button in the top-right (or Print to send straight to a printer)
Both formats include salon details, customer information, itemised pricing, and payment breakdown. Files are named invoice-{transaction number}.pdf or receipt-{transaction number}.pdf.
Step 10: Bulk Data Import (Migration)
If you're migrating to Luminate from another salon management system, bulk data import is available. This is handled by the Luminate support team.
What can be imported:
- Staff profiles and levels, including commission bands, monthly targets, roster settings and working days
- Customer records (including preferences, badges, and account credit — a customer's credit balance carries over as a single opening-balance adjustment in their new credit history)
- Tags
- Services (with their deposit rules, online-booking availability and colour-service settings) and products
- The colour catalogue — brands, lines, shade families, shade codes, product roles and gram stock, so the Colour Bar works from day one
- Appointments
- Transactions (with items and payments)
- Shifts/roster data and time blocks
- Colour test records, including the signed consent signatures
- Gift vouchers
Everything beyond the basics is optional. A simpler export from another system — one that has no colour catalogue, no commission bands, no deposit rules — imports perfectly happily; anything missing simply takes Luminate's default. Two things to know about those defaults, because they are deliberately permissive: a service arrives bookable online and deposit-free, and a staff member arrives on the roster. If your old system had services you never published online, or staff who never take appointments, check those settings after the import.
Duplicate customer email addresses are fine. Old systems accumulate them — a family sharing one inbox, the same person entered twice years apart. Luminate doesn't require customer email addresses to be unique and the validation pass deliberately doesn't check, so messy source data comes across intact rather than forcing you to clean it up first. Staff email addresses are the exception: those must be unique, because each one becomes a login.
Phone numbers — don't reformat them before you send them. This trips up migrations more than anything else on this page, so it's worth being precise.
Luminate stores phone numbers exactly as supplied and never rewrites them, in either direction. When it comes to sending an SMS, it expands whatever it holds into a full international number using the country recorded against that person. All of these forms are understood and dial the same number:
| Form | Example |
|---|---|
| National | 7781409105 |
| With trunk prefix | 07781409105 |
| Country-prefixed | 447781409105 |
| Full international | +447781409105 |
The country defaults to the UK when it isn't stated. That's the one thing to watch. Both customers and staff carry an optional two-letter country code (GB, GG, JE, IE, US…) alongside the number, and if your export doesn't supply one, every number is treated as British. An Irish or US number written in national form then gets dialled as a UK number and the message fails silently. If your salon has any non-UK numbers, either include the country code column or write those numbers in full international form with the + and country prefix — either works.
Because of all this, there's no need to bulk-reformat your numbers into a single style first, and doing so carries real risk: a rewrite mangles the numbers that were already correct. Send them as they are.
The validation pass reports a count of numbers that don't look valid for their country — useful for catching a digit dropped by the old system. It's advisory and never blocks the import, deliberately: the underlying phone library misclassifies some legitimate numbers, notably Jersey and Guernsey mobiles that share UK number ranges. Treat it as a list worth eyeballing, not a list of failures.
How it works:
- Contact support at hello@luminate.salon with details about your current system
- The team will help you prepare your data as a ZIP of JSON files — exactly the format produced by a JSON Full Salon export, so a JSON export from one Luminate salon imports directly into another
- A validation pass runs first (a dry run) to check every record before anything is written
- The final import is executed inside a single database transaction — it either succeeds completely or rolls back entirely, leaving no partial data
Important: Imports require a fresh salon with no existing data (other than the owner account). Plan your migration before you start entering data manually.
Step 11: Export Permissions
| Role | Data Exports | Report Exports | Transaction PDFs |
|---|---|---|---|
| Owner | Yes | Yes | Yes |
| Admin | Yes | Yes | Yes |
| Manager | No | No (can view reports but not export) | Yes |
| Staff | No | No | Own transactions only |
| Receptionist | No | No | Yes |
Data exports live inside Settings, and only Owners and Admins can open Settings at all — so if you can't find the Data tab, that's why. Ask an Owner or Admin to create the export for you.
Report exports follow the same permission. The Export button only appears for roles that hold export-reports, so a Manager opening the Daily Revenue report — or a Receptionist on the two reports they can reach — won't see it at all. The report is still theirs to read on screen; ask an Owner or Admin to run the export.
Common Pitfalls
"I don't see the Data tab in Settings"
You need the Owner or Admin role. Salon Settings is closed to Managers, Staff and Receptionists entirely, so the Data tab isn't reachable for them. Ask an Owner or Admin to create the export for you.
"There's no Export button on this report"
Two things hide it. Only Owners and Admins hold the export-reports permission, so other roles can read a report on screen but won't see the button — ask an Owner or Admin to run the export. It's also hidden when the report has no rows for the range you've selected, since there'd be nothing to put in the file; widen the date range (or clear any search or filter) until data appears and it comes back.
"My export failed"
Hover over the red error icon in the Export History table to see what went wrong. In most cases, you can simply try again by creating a new export. If the problem persists, contact support.
"The download link expired"
Completed exports are only available for 24 hours. You'll need to create a new export — the old file has been automatically cleaned up.
"The CSV looks jumbled in Excel"
This can happen if Excel doesn't recognise the delimiter. Try:
- Open Excel first (don't double-click the CSV)
- Go to Data > From Text/CSV
- Select the file and set the delimiter to "Comma"
"Numbers are formatted as text in my CSV"
Excel sometimes treats numbers as text. Select the column, right-click, choose Format Cells, and select Number or Currency as appropriate.
"I can't start a new full salon export"
Only one full salon export can run at a time. Wait for the current export to complete (or fail), then try again. Customer exports are not affected by this limit.
Tips and Best Practices
- Use JSON for backups — JSON exports can be re-imported into a new Luminate salon, making them ideal for data portability and disaster recovery
- Use CSV for your accountant — CSV files open directly in Excel and Google Sheets, perfect for financial analysis or sharing with external parties
- Export monthly — Create a routine to export key reports (revenue, payroll) at the end of each month for your records
- Respond to GDPR requests promptly — Use the Individual Customer export to quickly package all data about a customer. UK GDPR requires you to respond within one month
- Download promptly — Export files expire after 24 hours, so download them as soon as they're ready
- Use PDF for sharing — Use PDF report exports when sharing with stakeholders who don't need to manipulate the data
- Name files consistently — If saving exports locally, add the salon name and date to avoid confusion, especially with multiple locations
Related Tutorials
- Tutorial 9.2: Running Revenue Reports - Detailed revenue analysis and export
- Tutorial 9.3: Staff Performance and Commission Reports - Staff data and payroll exports
- Tutorial 9.6: Payroll Processing and Reports - Finalising a period before you export it
- Tutorial 9.11: Staff Commission Report - Per-staff commission detail and its export
- Tutorial 9.12: Colour Stock and Reorder Report - Stock levels and the reorder worklist
- Tutorial 11.2: GDPR Compliance - Data Protection and Privacy - Understanding your data obligations
- Tutorial 11.3: Managing Customer and Staff Data Retention - The Data Retention sub-tab and automatic anonymisation
- Tutorial 14.2: Managing Payment Methods and Billing - Downloading subscription invoices
Frequently Asked Questions
Can I export all my customer data?
Yes. Use the Full Salon export in Settings > Data > Exports. This includes all customer records with contact details, preferences, badges, and marketing consent. For a single customer's data, use the Individual Customer export.
Can I export appointment data?
Yes. Appointments are included in both full salon exports and individual customer exports. This includes appointment times, statuses, deposits, consultation notes, and cancellation reasons.
What's the difference between Data Exports and Report Exports?
Data Exports (Settings > Data > Exports) export your raw data — every record in the system. Report Exports (Reports section) export summarised, filtered views of your data for a specific date range. Use Data Exports for backups and GDPR; use Report Exports for accounting and analysis.
Can I schedule automatic exports?
Automatic scheduled exports aren't currently available. You need to manually create exports as needed.
How do I handle a GDPR Subject Access Request?
Go to Settings > Data > Exports, select Individual Customer, search for the customer, and create a JSON or CSV export. This packages everything Luminate holds about that customer into a downloadable ZIP file. (You can also use Export Data, under Export Customer Data on the customer's profile page — it deep-links to the Exports sub-tab with the customer pre-selected.)
Can I import data from a CSV or Excel file?
The bulk import system uses JSON format. If you have data in spreadsheets, contact support at hello@luminate.salon who can help convert it to the required format.
Is there a size limit on exports?
No practical limit. Full salon exports for large salons with years of data may take several minutes to process, but the system handles this in the background with progress tracking.
Can I export from multiple salons at once?
No — exports are salon-specific. Switch to each salon and create exports separately.
What happens if I delete an export?
The export record and its ZIP file are permanently removed. You can always create a new export if you need the data again.
Last Updated: August 2026